Self-Watering Planters: Do They Actually Work? Honest Review After 5+ Years of Testing
Wondering if self-watering planters actually work? Get an honest review after 5+ years of testing! Learn which plants thrive, which fail, pros/cons, and whether they're worth the investment.
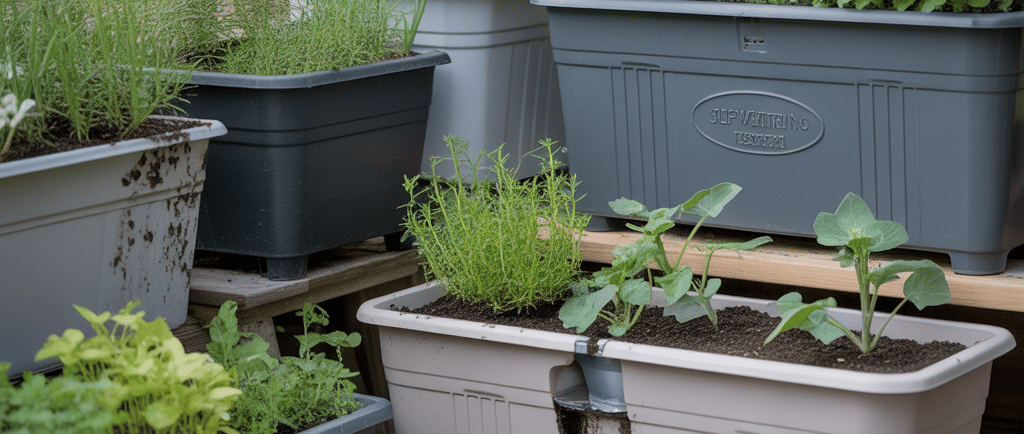
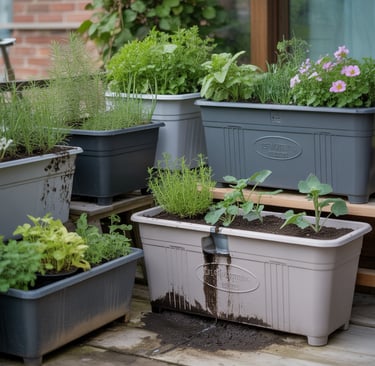
CONTAINER TINY PLOTS: CROPS, SOIL & CLEVER HACKS
Introduction
I'll never forget the moment I became a believer in self-watering planters. It was late July, peak summer heat, and I'd just returned from a 10-day vacation. I walked onto my balcony expecting to find my usual scene of devastation—wilted plants, crispy leaves, maybe a few survivors clinging to life. Instead, my tomatoes in self-watering containers were thriving. Green, lush, with new flowers forming. They looked better than when I'd left.
Meanwhile, my regular containers were exactly as expected: dead or dying. The petunias were toast. The basil was a crispy brown stick. The regular tomato plants (same variety as the self-watering ones) were severely wilted and dropped most of their flowers. The difference was stark and undeniable.
Before that trip, I'd been skeptical about self-watering planters. They seemed gimmicky—how could a pot actually water itself? And the price was off-putting. Why spend $30-50 on a self-watering planter when regular pots cost $5-10? I'd bought a few to test before my vacation, more as an experiment than a serious investment. That experiment convinced me completely.
Here's what really drove it home: over the following seasons, I tracked yields from identical tomato plants in self-watering containers versus regular containers. The self-watering tomatoes produced 40-50% more fruit. Not a small difference—a massive, undeniable difference that paid for the containers in one season through increased harvest.
I've now been using self-watering planters for over five years. I've tested probably 20+ different brands and styles, from $15 budget options to $100+ premium planters. I've grown vegetables, herbs, flowers, and houseplants in them. I've had spectacular successes and complete failures. I've learned which plants love them and which plants die in them. I've figured out maintenance requirements, troubleshooting solutions, and exactly what self-watering planters can and can't do.
In this guide, I'm sharing everything I've learned from five years of real-world testing. Not marketing claims or theory—actual results from growing in dozens of self-watering containers in different conditions. We'll cover how they work, which plants thrive versus fail, honest pros and cons, whether they're worth the cost, and all the practical details you need to decide if self-watering planters make sense for you. Let's dive in!
How Self-Watering Planters Actually Work
Before we get into whether they work, let's understand what's happening inside these containers.
The basic reservoir and wicking system is elegantly simple. Self-watering planters have two chambers: a water reservoir at the bottom and a soil chamber above it. Between them is a barrier (usually a perforated platform) that separates the chambers while allowing water to move upward. Some soil extends down through the barrier into the reservoir—this soil acts as a wick. Water moves from the reservoir up through the wicking soil and into the main soil mass through capillary action.
Capillary action is the science behind it—water naturally moves upward through small spaces due to adhesion and cohesion forces. Think of how a paper towel absorbs water upward when you touch the bottom edge to water. Soil particles create millions of tiny spaces that water moves through via capillary action. The wicking soil column creates a continuous pathway for water to move from reservoir to root zone. This isn't magic—it's basic physics that's been understood for centuries.
Different self-watering mechanisms exist, and understanding them helps you choose and use planters effectively. Wick systems use a fabric or rope wick extending from reservoir to soil—water moves up the wick. Sub-irrigation systems (most common) use a soil column as the wick as I described above. Hybrid systems combine wicking with periodic top-watering. I've used all three types. Sub-irrigation is most common and works best in my experience. Pure wick systems are less reliable—the wick can dry out or fail.
How water moves from reservoir to soil happens continuously as long as the soil is slightly drier than saturated. Water wicks up, the soil becomes moist, roots absorb water, soil dries slightly, more water wicks up. It's a self-regulating system—water only moves up when the soil needs it. When soil is fully saturated, capillary action stops because there's no drying gradient to pull water upward. This automatic regulation is what makes the system work without constant attention.
The role of the soil barrier and air gap is critical and often misunderstood. The barrier prevents all the soil from sitting directly in water (which would cause root rot). There's typically a 1-3 inch air gap between water level and the bottom of the main soil chamber. Only the wicking column extends into the water. This air gap allows oxygen to reach the lower soil and prevents waterlogging. When I've seen DIY systems fail, it's usually because there's no air gap—the soil sits directly in water.
Water level indicators tell you when to refill—most self-watering planters have a tube with a float or simply a tube you can visually check water level through. When the indicator shows empty, you refill the reservoir. How often this happens depends on plant size, temperature, and season. In summer with large plants, I refill every 3-5 days. In spring or with small plants, every 7-10 days. The indicator takes all guessing out of watering timing.
Overflow drainage is essential and prevents the reservoir from overfilling. There's typically a hole near the top of the reservoir that allows excess water to drain out. This prevents the reservoir from overflowing from rain (for outdoor planters) or from overfilling when you add water. I've learned to stop filling when I see water coming from the overflow hole. Without overflow drainage, you could inadvertently flood the soil chamber.
Comparing self-watering to traditional watering: in traditional pots, you water from the top, water drains through soil and out the bottom, and you repeat when soil dries out. This creates wet-dry cycles. In self-watering planters, moisture is constant (soil stays consistently moist but not soggy), water is delivered from below, and you're managing a reservoir rather than directly watering soil. The consistent moisture is the key difference—no stress cycles from drying out and rehydrating.
My 5-Year Journey Testing Self-Watering Planters
Let me share my actual experience so you understand where this advice comes from.
Starting with skepticism and high hopes, I bought my first three self-watering planters in spring 2019. I was skeptical they'd work as advertised but hopeful they'd solve my vacation watering problem. I planted one with tomatoes, one with herbs, one with petunias. I also planted identical plants in regular containers as controls. The first few weeks, I saw no difference—plants in both types of containers grew similarly. I almost wrote them off as expensive gimmicks.
First successes that convinced me came that summer. The tomatoes in self-watering containers started dramatically outperforming regular containers. More vigorous growth, more flowers, earlier fruit set. By mid-July, the difference was obvious. Then came my vacation—the self-watering plants thrived while regular containers suffered. I came home convinced and immediately bought more self-watering planters. The tomato yield at season's end sealed the deal: 65 tomatoes from the self-watering plant versus 38 from the regular container (same variety, same care otherwise).
Spectacular failures that taught lessons happened when I tried succulents in self-watering planters. Total disaster. Root rot within weeks, dead plants, wasted money. I also killed rosemary and lavender by assuming self-watering would work for everything. These failures taught me that self-watering isn't universal—it's specifically good for plants that like consistent moisture and terrible for plants that prefer drying out between waterings. This realization saved me from further expensive mistakes.
Testing different brands and styles became a bit of an obsession. I've tested cheap $15 planters from big-box stores, mid-range $30-50 options, and premium $80-100 planters. I've used hanging self-watering baskets, large 10-gallon containers for tomatoes, decorative indoor pots, and basic functional outdoor containers. Some brands worked beautifully. Others failed (wicking systems that didn't wick, reservoirs that leaked, flimsy construction). I learned which brands to trust through trial and error.
Plants that thrived versus plants that died: thrived: tomatoes, peppers, basil, lettuce, pothos, peace lilies, petunias, impatiens, begonias, chard, kale, cucumbers (with large enough containers), annual flowers. Died or struggled: all succulents and cacti, rosemary, lavender, thyme, oregano, snake plants, ZZ plants, any drought-tolerant plant. The pattern became clear: moisture-loving plants thrive, drought-tolerant plants fail. This knowledge now guides all my self-watering planter decisions.
Learning what works and what doesn't took about two full growing seasons. By year three, I had a system: self-watering for vegetables and moisture-loving plants, regular containers for everything else. I learned that soil choice matters enormously (regular potting mix works better than specialized "self-watering" mixes in my experience). I learned that starting plants in self-watering containers is tricky—better to establish in regular pots first, then transplant. I learned maintenance requirements and troubleshooting solutions.
Comparing costs over time, my initial $500 investment in self-watering planters (buying 15-20 containers) has paid for itself multiple times through: increased vegetable yields (easily $300-400 worth of extra produce per year), reduced plant replacement costs (far fewer plants dying from inconsistent watering—saved probably $200+ in replacement plants), and time savings (worth hundreds per year in reduced daily watering). By year two, the return on investment was clear.
Current collection and usage patterns: I now own about 25 self-watering planters of various sizes. I use them exclusively for tomatoes, peppers, herbs that like moisture (basil, cilantro, parsley), lettuce, and moisture-loving houseplants. I've stopped experimenting with plants I know won't work. I've settled on a few trusted brands and buy those. I still use regular containers for about 40% of my plants—things that don't benefit from self-watering or where the cost isn't justified. It's a mixed system optimized for each plant's needs.
The Honest Pros of Self-Watering Planters
Let me share the genuine benefits I've experienced, not marketing hype.
Consistent moisture prevents stress cycles that reduce plant growth and yield. In regular containers, plants experience wet-dry cycles—saturated after watering, progressively drier until the next watering. Each dry period is a stress event that slows growth. Self-watering planters maintain consistent moisture—never waterlogged, never bone dry. I've noticed this most dramatically in tomatoes: self-watered plants show continuous growth without the pause-and-surge pattern I see in traditionally-watered plants.
Watering frequency reduced dramatically—this is the most immediately obvious benefit. In regular containers, I water daily (sometimes twice daily in peak summer). In self-watering containers, I refill the reservoir every 3-7 days depending on plant size and weather. That's a reduction from 14-30 waterings per week to 2-3 reservoir fills. The time savings is substantial. On vacation, self-watering containers go 7-10 days easily while regular containers would die without daily attention.
Vacation and travel solutions work actually reliably—this was my original motivation and it absolutely delivers. I've taken trips from 5 days to 2 weeks and self-watering plants survived and thrived every time. I fill reservoirs completely before leaving, and plants are fine when I return. Compare this to the anxiety and expense of finding someone to water daily, or the plant casualties from leaving them unattended. Self-watering planters have eliminated vacation plant stress completely for me.
Reduced plant deaths from inconsistent watering is significant. Before self-watering planters, I probably lost 10-15% of container plants annually to watering mistakes (either forgetting to water or overwatering to compensate for forgetting). Since switching moisture-loving plants to self-watering, I've lost maybe 2-3 plants in five years from watering issues. That's dramatic improvement in plant survival rate.
Better growth and production in many plants is measurable and impressive. My tomato yields in self-watering containers are consistently 40-50% higher than in regular containers. Peppers produce earlier and more heavily. Lettuce grows faster and stays sweet longer without bolting. Annual flowers bloom more profusely. The consistent moisture allows plants to put all energy into growth and production rather than stress management. This isn't subtle—it's obvious and significant.
Less time spent on daily plant maintenance adds up to hours per week. In peak summer, I spent 45-60 minutes daily watering all my containers. Now I spend maybe 15 minutes 2-3 times per week filling reservoirs. That's roughly 4-5 hours per week saved. Over a 6-month growing season, that's 100+ hours saved. The time value alone justifies the investment for me.
Prevents overwatering in some situations where I tend to water too frequently. With self-watering planters, I can't overwater—once the reservoir is full, excess water drains out the overflow. The self-regulating wicking system prevents waterlogging because water only moves up as needed. For plants like peace lilies that I used to kill by overwatering, self-watering planters have been foolproof. The system protects against my tendency to water too much.
Works well for forgetful or busy plant owners—if you're someone who forgets to water or has unpredictable schedules, self-watering planters are transformative. You can't forget for a day or two and lose plants. The reservoir provides a buffer that makes plant care more forgiving. I've recommended self-watering planters to friends who "kill everything" and they've finally had success. The automation removes the need for perfect daily attention.
The Real Cons and Limitations
Now for the honest downsides I've experienced—these are real limitations, not nitpicks.
High upfront cost is the most obvious barrier—self-watering planters cost 3-10x more than equivalent regular pots. A basic 10-inch regular pot costs $5-8. A comparable self-watering planter costs $25-40. A large 5-7 gallon self-watering container for vegetables runs $40-70 versus $10-15 for a regular container. When furnishing a balcony garden with 20 containers, that's $400-800 versus $100-200. The cost difference is substantial and upfront. It pays back over time but the initial investment is steep.
Heavier and harder to move when filled—the reservoir adds weight, and you typically keep the reservoir full. A 5-gallon self-watering planter with soil, plant, and full reservoir weighs 50-60 pounds. The equivalent regular container weighs maybe 35-40 pounds. Moving them for cleaning, rearranging, or seasonal storage is physically harder. I've learned to position self-watering planters where I want them long-term because moving them once planted is a real chore.
Not suitable for all plant types—as I learned painfully, anything that prefers dry periods between watering will fail in self-watering planters. This eliminates succulents, cacti, Mediterranean herbs, drought-tolerant natives, and any plant adapted to dry conditions. That's a significant portion of popular container plants. Self-watering works brilliantly for maybe 50-60% of common plants and terribly for the rest. You need a mixed approach, not all-or-nothing.
Can encourage overwatering in some cases where I maintain the reservoir too full. I've learned the hard way that in cool wet spring or in low-light indoor conditions, plants use water slowly. If I keep the reservoir topped off, soil can actually stay too wet. I've caused root rot in a few plants by being overly diligent about keeping reservoirs full in conditions where plants needed less water. The system isn't truly foolproof—you still need to consider seasonal and environmental factors.
Reservoir can grow algae or develop odors—this is a maintenance issue I didn't anticipate. Algae grows in water exposed to light, and reservoirs can develop a swampy smell if water sits too long. I've opened reservoirs to find green slimy algae or murky smelly water. This requires periodic cleaning (draining and rinsing the reservoir). It's not constant but it's a task regular pots don't require. Outdoor containers in sun are most prone to algae.
More complex to clean and maintain than standard pots—at season's end, cleaning self-watering planters is more involved than dumping soil from regular pots. You need to disassemble the planter, clean the reservoir, clean the wicking system, clean the soil chamber, check for salt buildup, ensure drainage holes aren't clogged, then reassemble. This takes 10-15 minutes per planter versus 2-3 minutes for regular pots. With 25 planters, that's significant extra work.
Larger footprint than standard pots—self-watering planters are generally wider and taller than regular pots of equivalent soil volume because they incorporate the reservoir. A self-watering planter with 3 gallons of soil might be 14 inches tall and 12 inches wide. A regular 3-gallon pot might be 10 inches tall and 10 inches wide. On a small balcony where space is premium, this larger footprint means I can fit fewer self-watering planters than regular containers. The space tradeoff is real.
Initial learning curve for optimal use took me about one full season to overcome. I made mistakes in the first year: overfilling reservoirs, using wrong soil, trying incompatible plants, not establishing wicking properly. Each mistake taught me, but there was definitely a learning period. Self-watering planters aren't just "add water and forget"—they require understanding how the system works and adjusting your care accordingly. The learning curve isn't steep but it exists.
Plants That Thrive in Self-Watering Planters
These are the plants where I've seen dramatic improvement in self-watering containers.
Tomatoes deliver spectacular results—this is where self-watering planters shine most. The consistent moisture prevents blossom end rot (caused by inconsistent watering), produces heavier yields, larger fruit, and longer production season. My self-watered tomatoes produce from July through October without slowing down. Regular container tomatoes often decline in late season from watering stress. The difference is night-and-day. Every tomato I grow now goes in self-watering containers—the investment pays for itself in one season through increased harvest.
Peppers and eggplants show consistent production all season long in self-watering planters. Peppers are prone to blossom drop from water stress—self-watering eliminates this. My self-watered peppers set fruit continuously while regular container peppers show cycles of production and stall. Eggplant, which is very sensitive to water stress, produces 2-3x more fruit in self-watering containers in my experience. Both crops absolutely love the consistent moisture.
Herbs that love moisture—basil, parsley, cilantro—thrive spectacularly. Basil especially shows dramatic improvement: larger leaves, faster growth, delayed bolting, more vigorous production. I grow basil in self-watering containers and harvest continuously for months. Cilantro, which normally bolts quickly in heat, lasts weeks longer in self-watering planters. Parsley grows enormous in self-watering containers—I have plants that produce for over a year. These moisture-loving herbs are perfect candidates.
Lettuce and salad greens maintain perfect moisture levels without constant attention. Lettuce hates drying out (causes bitterness and bolting) but also hates being waterlogged. Self-watering planters maintain the sweet spot automatically. My self-watered lettuce produces tender sweet leaves for weeks longer than regular containers. I can grow lettuce through summer in self-watering planters—something I couldn't do reliably in regular containers where heat caused rapid drying and bolting.
Tropical houseplants like pothos, peace lilies, and ferns love self-watering systems. These plants want consistent moisture and hate drying out. I've had peace lilies in self-watering planters for 3+ years that bloom multiple times per year and look perfect with minimal attention. Pothos grows rampantly. Ferns stay lush and green without the crispy edges they get in regular pots when I forget to water. For tropical houseplants, self-watering has been transformative.
Annual flowers—petunias, impatiens, begonias—produce more blooms and longer flowering. Petunias especially benefit: they're heavy drinkers that wilt quickly in regular pots but bloom profusely with consistent moisture. My self-watered petunias bloom continuously from May through October. Impatiens (which like shade and moisture) are perfect in self-watering hanging baskets—I've had beautiful full baskets with minimal maintenance. The consistent moisture keeps annual flowers at peak performance.
Vegetables that need consistent moisture—cucumbers, summer squash, chard, kale—all benefit significantly. Cucumbers in particular hate water stress (causes bitter cucumbers and poor production). In large self-watering containers (7-10 gallons), cucumbers are incredibly productive. Chard and kale grow enormous leaves and produce for months. Any vegetable that's sensitive to moisture fluctuation performs better in self-watering containers.
Why these plants love self-watering systems comes down to their evolution and physiology. These are plants from environments with consistent moisture—tropical regions, riparian areas, temperate climates with regular rainfall. They evolved with reliable water availability and haven't adapted drought tolerance mechanisms. Consistent moisture allows optimal photosynthesis, nutrient uptake, and growth. Variable moisture creates stress that reduces performance. Self-watering provides the consistency these plants are adapted for.
Plants That Fail in Self-Watering Planters
I learned these the hard way—save yourself the money and plant deaths.
Succulents and cacti are root rot disasters in self-watering planters. I killed $50+ worth of succulents before accepting this truth. Succulents store water in leaves/stems and need soil to dry completely between waterings. The constant moisture in self-watering planters rots their roots within weeks. Cacti are even worse—they're extremely drought-adapted and the consistent moisture kills them rapidly. I've never seen a succulent or cactus survive long-term in self-watering. Don't try it.
Mediterranean herbs like rosemary, lavender, and thyme hate self-watering planters. These herbs evolved in dry climates with infrequent rain. They prefer drying out between waterings and actually develop better flavor with some drought stress. I killed three rosemary plants before learning this. The constant moisture makes Mediterranean herbs leggy, reduces their aromatic oils (weakening flavor), and eventually causes root rot. Thyme lasted maybe two months before rotting. These herbs need regular pots with infrequent watering.
Plants that prefer dry periods between watering are broadly incompatible. This includes snake plants, ZZ plants, many palms, jade plants, Christmas cactus, and most drought-tolerant species. These plants have adaptations for storing water or surviving drought—they don't just tolerate dry periods, they actually need them. The constant moisture disrupts their growth cycle and causes problems. I've had moderate success with some of these in self-watering planters if I let the reservoir empty and stay empty for weeks, but that defeats the purpose.
Orchids and other epiphytes are wrong for standard self-watering systems. Orchids grow on trees in nature—their roots are adapted to air and periodic drying. They need specialized well-draining media and absolutely cannot tolerate constantly wet roots. I tried orchids in self-watering planters with bark media—total failure. The roots rotted despite the well-draining media because the constant wicking kept things too moist. Orchids need their own specialized containers, not self-watering planters.
Drought-tolerant natives adapted to arid or seasonal-dry climates fail in self-watering. Native plants from prairie, chaparral, or desert ecosystems evolved with seasonal drought and don't perform well with constant moisture. I've tried various native plants in self-watering containers thinking "easier care" would be good—they all performed poorly or died. These plants literally don't know what to do with constant moisture. Their biology is adapted for drought cycles.
Why these plants hate constant moisture relates to their adaptations. Drought-tolerant plants often have specialized root systems that can rot in constantly moist conditions. They may have CAM photosynthesis that functions differently with constant water. Many have succulent leaves or stems that store water and will burst or rot with excess moisture. Some need dry periods to trigger flowering or growth cycles. The constant moisture provided by self-watering systems is actively harmful to these plants' biology.
Alternatives for dry-loving plants include: regular terra cotta pots (dry out quickly), gritty well-draining soil mixes, infrequent watering schedules, or even intentionally undersized pots (dry faster). For succulents, I use shallow terra cotta bowls with cactus mix and water every 10-14 days. For Mediterranean herbs, regular pots with gravelly mix and weekly watering. These plants do better with "benign neglect" than with the attentive consistent moisture that self-watering provides.
Signs your plant doesn't like self-watering include: yellowing leaves despite no other problems, mushy stems or roots, mold growing on soil surface, plant looks "waterlogged" or swollen, declining health despite theoretically good care, or the plant just slowly failing with no obvious cause. If you see these signs in a self-watering planter, the problem is likely too much moisture. Move the plant to a regular container and it will likely recover.
Best Self-Watering Planters I've Actually Tested
I've tested dozens of brands and styles—here's what actually works.
Budget options under $30 that work: I've had good results with Bloem Aqua-Rite planters ($15-25 depending on size). Basic functionality, no frills, but the wicking system works reliably. Also Mainstays brand self-watering planters from Walmart ($12-20)—surprisingly functional despite low price. These budget options won't last forever (3-5 years before plastic becomes brittle) but they work well while they last. For beginners or people wanting to test self-watering, budget options are fine.
Mid-range planters offering best value for money: Gardener's Supply Company self-watering containers ($30-50) are my workhorses. Well-designed, durable, effective wicking, good size options. Cole & Mason self-watering planters ($25-40) also perform well. These mid-range options balance cost and quality nicely. They last 7-10+ years, work reliably, and the price is reasonable. This is where I buy most of my self-watering planters now—the sweet spot of value.
Premium options and whether they're worth it: Lechuza planters ($60-150+) are beautiful, extremely well-made, with clever reservoir systems and built-in water gauges. They're worth it for indoor decorative use where aesthetics matter. I have three Lechuza planters for indoor plants in visible locations—they look like furniture, not utilitarian pots. For outdoor vegetable growing? Not worth the premium. The expensive planters don't grow better vegetables than mid-range options. Premium is about aesthetics and durability, not performance.
DIY self-watering systems that actually work include the "bucket in bucket" method I've used successfully. Put a smaller bucket with holes inside a larger bucket, add water to the space between them, soil in the inner bucket with some extending down for wicking. Total cost: $8-12 per planter versus $30-40 commercial. I've made 10+ DIY self-watering planters that work well. The effort investment is maybe 30 minutes per planter. For budget gardeners, DIY is absolutely viable.
Hanging self-watering planters have been game-changers—regular hanging baskets dry out brutally fast (twice daily watering in summer). Self-watering hanging baskets need filling every 5-7 days. I use Bloem and Gardener's Supply self-watering hanging baskets ($20-35). The reservoir makes hanging baskets actually manageable. Without self-watering, I'd probably skip hanging baskets entirely—the maintenance is too much. With self-watering, they're easy and beautiful.
Large container options for vegetables: I've tested 5-7 gallon self-watering planters from several brands for tomatoes and peppers. Best performer: Gardener's Supply 5-gallon self-watering planters ($40-50). Also good: Bloem Aqua-Rite 7-gallon ($30-35). These large containers need sturdy construction because they're heavy when full. I've had cheap large planters crack under the weight—buy quality for large sizes. The investment is worth it for vegetable growing.
Indoor decorative self-watering pots are where premium makes sense. Lechuza, Cole & Mason, and West Elm (yes, really) make attractive self-watering planters that look like decor. For living room or office plants where appearance matters, these are worth the $50-120 price tag. They're elegant, well-made, and the self-watering function is hidden—guests don't know they're looking at self-watering planters. For purely functional outdoor use, save money. For decorative indoor use, invest in quality.
Brands to seek out: Gardener's Supply Company (great quality-price balance), Bloem (good budget option), Lechuza (premium quality), Cole & Mason (good mid-range), Window Garden (specialized for herbs and small plants). Brands to avoid based on my experience: Dollar store no-name brands (leak, crack, fail quickly), ultra-cheap online brands I've never heard of (quality control issues), and overly complicated "smart" planters with electronics (more failure points, not worth it).
DIY Self-Watering Planters: Worth the Effort?
I've made probably 15-20 DIY self-watering planters over the years. Here's my honest assessment.
Basic bucket/container conversion method works reliably if done correctly. Take a 5-gallon bucket (your reservoir), drill drainage holes in a smaller 3-4 gallon bucket or thick plastic pot, nest the smaller container inside the larger, add water to the reservoir (space around the smaller container), add potting mix to the smaller container with some soil extending down into the reservoir to wick. Put an overflow hole near the top of the reservoir. Total construction time: 20-30 minutes once you have materials.
Materials needed and total costs for DIY: 5-gallon bucket ($3-5), 3-gallon bucket or large plastic pot ($3-5), drill with various bits ($20 if you don't own one, but then you have it for multiple projects), potting mix (same as any planter), and optionally a water level indicator tube ($3-5). Total per planter: $6-15 depending on materials. Compare to $30-50 for commercial equivalent. Over 10 planters, you save $200-350. For budget-conscious gardeners, this math is compelling.
Step-by-step conversion process I use: 1) Drill 6-8 small holes (1/4 inch) in bottom and lower sides of inner container for water wicking. 2) Drill one overflow hole about 3 inches from bottom of outer container. 3) Place inner container inside outer container. 4) Fill the reservoir (space between containers) with water to test—water should reach just below the bottom of the inner container. Mark this level. 5) Add potting mix to inner container. 6) Push some potting mix down through the holes into the reservoir—this creates wicking columns. 7) Plant your plant. 8) Water from top initially to establish wicking, then fill reservoir.
Success rate compared to commercial planters is excellent if you follow directions. I've had maybe 90% success with DIY systems—meaning they function as intended and plants thrive. The 10% failures were from construction mistakes (overflow hole in wrong place, holes too large allowing soil to fall into reservoir, etc.). Once I refined my technique, DIY success rate equals commercial planters. The only difference is aesthetics—DIY planters look like buckets, commercial look like nice pots.
Time investment versus money saved: each DIY planter takes 20-30 minutes to build. For 10 planters, that's 3-5 hours total. Money saved: roughly $200-300. That's $40-60 per hour "earned" through DIY. For me, that's worth it. If your time is more valuable or you hate DIY projects, buying commercial makes sense. If you're budget-limited or enjoy projects, DIY is absolutely worthwhile. I still make DIY planters for purely functional applications (vegetable growing where aesthetics don't matter).
Best candidates for DIY conversion: large containers for vegetables (5-7 gallons), outdoor planters where aesthetics don't matter, situations where you need many planters and cost is prohibitive, renters who want self-watering but don't want to invest heavily. Poor candidates: small planters (DIY is fussy at small scale), indoor decorative use (they look homemade), hanging planters (difficult to achieve proper weight distribution and stability).
Common mistakes in DIY systems I've made: putting overflow hole too high (reservoir overfills before overflow), holes in inner container too large (soil falls into reservoir), no wicking columns established (soil doesn't extend down into water, wicking fails), using non-food-safe buckets for edibles (chemicals leaching), forgetting to establish wicking with initial top-watering (system never starts wicking). All these mistakes are fixable but it's better to avoid them. Follow instructions carefully on your first few builds.
When DIY makes sense versus buying commercial: DIY makes sense when you need multiple large planters, have limited budget, don't care about aesthetics, and have some DIY skills. Buying commercial makes sense when you want one or two planters, prefer finished appearance, value time over money, or want decorative indoor planters. I use both—DIY for tomatoes and outdoor vegetables, commercial for herbs and indoor plants. It's not either-or.
Setting Up Self-Watering Planters for Success
Initial setup is critical—do this wrong and the system won't work properly.
Choosing the right potting mix is more critical than you'd think. I've tested various mixes and found that standard quality potting mix works better than specialized "self-watering" potting mix in most cases. Why? Standard mix (peat or coir-based with perlite) wicks water effectively while still draining excess. Some self-watering mixes are too dense and stay too wet. Some are too light and don't wick well. I use standard Espoma or FoxFarm potting mix in all my self-watering planters with excellent results.
Why regular potting soil often works better than "special" mixes: the marketing suggests you need specialized mix for self-watering, but I've found regular potting mix performs equally or better. The key is that the mix needs to retain some moisture while allowing air—standard potting mix does this. Very dense mixes (some self-watering mixes are too dense) stay waterlogged. Very light mixes (some seed-starting mixes) don't retain enough moisture. Medium-texture standard potting mix is the sweet spot. I've saved money and gotten better results using standard mix.
Initial watering using top and bottom method is essential for establishing wicking. Even though self-watering planters are designed for bottom watering, you need to water from the top initially until water drains into the reservoir. This establishes the capillary connection between soil and reservoir. If you just fill the reservoir and hope it wicks, it often doesn't work initially because dry soil doesn't wick well. My process: plant the plant, water thoroughly from top until water drains into reservoir, then maintain reservoir after that.
Filling the reservoir correctly means filling until water comes out the overflow hole. This sounds obvious but I've seen people underfill (defeating the purpose) or overfill by pouring water into the soil (bypassing the reservoir). Find the reservoir fill tube (usually separate from the planting area), pour water into that tube until water overflows, then stop. The reservoir is now full. The overflow prevents overfilling. Don't pour water into the soil chamber—that's not how the system works.
Establishing the wicking action takes a few days sometimes. After initial setup, check the soil every day for the first week. Top 2 inches should dry slightly while lower soil stays moist. If top soil is very dry and plant is wilting despite full reservoir, wicking hasn't established—water from top again to re-establish connection. Once wicking is established, you'll see consistent moisture gradient (slightly drier at top, moist below) and plants thriving. Usually establishes within 3-5 days if initial setup was done correctly.
First few weeks—what to expect: the plant may show slight stress from being transplanted (normal transplant shock), soil moisture may be variable while wicking establishes, you might need to top-water once or twice in the first week. Within 2-3 weeks, the plant should show vigorous growth and the reservoir should be drawing down predictably. If after 3 weeks the reservoir level isn't dropping, something is wrong (likely poor wicking connection—troubleshoot by top-watering).
Transitioning plants to self-watering systems works best if you transplant established plants (not seedlings) and let them acclimate. I've had best success transplanting plants that are 4-6 weeks old and established. Very young seedlings seem to struggle more with the transition. When transplanting, I keep the root ball intact, water thoroughly from top after planting, then transition to reservoir-only watering after a few days. Success rate with established plants is near 100%.
Seasonal adjustments needed: in spring/fall, plants use less water—let reservoir empty and stay empty for a few days before refilling. In peak summer, keep reservoir full constantly. In winter (for indoor plants), reduce reservoir refilling to every 10-14 days or even less. The system is self-regulating to an extent, but seasonal variation in water use is significant. I adjust my refilling frequency based on how fast reservoir empties—if it's taking 10+ days to empty, I let it stay empty longer between refills.
Maintenance: More Than Just Refilling Water
Self-watering planters need maintenance beyond just adding water—I learned this through problems.
How often to actually refill varies dramatically by season and plant size. Summer with large plants: every 3-5 days. Spring/fall with moderate plants: every 5-10 days. Winter with small plants: every 10-20 days. I check reservoirs every 3-4 days using the water level indicator. If empty, I refill. If still half-full, I leave it. The key is checking regularly, not refilling on a schedule. The plant tells you (through reservoir level) when it needs water.
Cleaning the reservoir to prevent algae and odors is necessary 1-2 times per growing season, or annually for perennials. I drain the reservoir completely, tip the planter to pour out reservoir water, remove the plant if possible, rinse the reservoir with clean water, scrub if there's visible algae or residue, rinse again, and refill with fresh water. This takes 10-15 minutes per planter. I do it mid-season for vegetable planters and annually for houseplant containers. The difference in reservoir cleanliness is noticeable.
Salt buildup issues and solutions are common in self-watering planters because salts from fertilizer accumulate in the soil over time. You'll see white crusty deposits on the soil surface. Solution: periodically water from the top (not just the reservoir) to flush salts down and out the drainage holes. I do this monthly—pour water from the top until it drains heavily from the bottom. This leaches accumulated salts. Or repot with fresh soil annually to eliminate buildup.
When and how to fertilize in self-watering systems: I use liquid fertilizer added to the reservoir water every 2-4 weeks during active growth. I fill the reservoir with diluted fertilizer solution rather than plain water. This distributes nutrients throughout the soil via wicking. Or you can use slow-release granular fertilizer mixed into soil at planting—this provides baseline nutrition for months. I do both: slow-release at planting, plus occasional liquid fertilizer during peak growth.
Checking wicking system function periodically ensures the system is working. Once or twice per season, I check that water is actually moving from reservoir to soil. I do this by: noting reservoir level, waiting 2-3 days, checking if level has dropped, and checking if soil is moist. If reservoir level doesn't drop and soil is dry, wicking has failed. Usually this means the wicking columns have dried out or broken—top-water thoroughly to re-establish. I've had this happen maybe 3-4 times in five years.
Seasonal deep cleaning requirements: at season end (or annually for perennials), I do complete disassembly and cleaning. Remove plant, dump all soil, separate the reservoir chamber, scrub both chambers with soap and water, rinse thoroughly, check for cracks or damage, check that overflow hole isn't clogged, let dry completely, reassemble, add fresh soil. This deep cleaning prevents long-term problems and extends planter lifespan. Takes 15-20 minutes per planter but prevents issues.
Replacing wicking materials over time is necessary if you have planters with fabric wicks rather than soil columns. Fabric wicks can degrade or clog over 2-3 years. I've had to replace wicks on a few planters—it's fussy and annoying. This is why I prefer soil-column wicking systems—nothing to replace. If you have wick-based systems and they stop wicking, replacing the wick fabric is necessary. Or just replace the whole planter—sometimes that's easier.
Long-term maintenance schedule I follow: weekly during growing season—check and refill reservoirs, monthly—top-water to flush salts, fertilize, mid-season—clean reservoir (drain and rinse), seasonally/annually—deep clean, fresh soil, inspect for damage. This schedule keeps self-watering planters functioning well for years. Neglecting maintenance leads to problems: algae, salt buildup, wicking failure, odors. Regular maintenance is key to long-term success.
Troubleshooting Common Self-Watering Problems
Here are the problems I've encountered and how I solved them.
Water not wicking up to soil is the most frustrating problem. Symptoms: full reservoir but dry soil and wilting plant. Causes: wicking columns not properly established, air gap too large, soil is hydrophobic (repels water). Solution: water thoroughly from the top to re-establish wicking connection. Use a wetting agent (drop of dish soap in water) if soil is hydrophobic. Ensure some soil extends down into reservoir through the wicking holes. This problem usually happens at initial setup or after letting soil dry out completely.
Soil staying too wet at top indicates wicking is too aggressive or the reservoir is overfilled. Symptoms: soil surface stays muddy, mold grows on surface, plant shows overwatering symptoms. Causes: no proper air gap (soil sitting directly in water), overflow hole blocked or too high. Solution: ensure overflow is functioning, reduce how often you refill reservoir (let it empty for a few days between fills), improve top soil drainage by mixing in perlite. I've had this in a few planters where I blocked the overflow accidentally.
Plants wilting despite full reservoir means wicking has failed or roots haven't reached wicking soil yet. Symptoms: reservoir full but plant looks dry and wilted. Causes: wicking connection broken, new plant whose roots haven't grown into the wicking zone yet, air gap is too large for capillary action. Solution: water from top to directly water roots and re-establish wicking. For new plants, patience—sometimes takes a week for roots to reach the wicking zone. Check that wicking columns exist and extend into reservoir.
Algae growing in reservoir is common in outdoor planters exposed to sun. Symptoms: green water in reservoir, slimy growth on reservoir walls, sometimes foul smell. Solution: drain and clean reservoir, block light from reaching water (use opaque fill tube covers, wrap reservoir area if it's clear plastic), add a small amount of hydrogen peroxide to reservoir water (inhibits algae growth), or just accept it and clean periodically. Algae is mostly aesthetic—it doesn't harm plants directly. I've learned to just clean it out seasonally.
Foul odors from standing water happen when water sits too long or organic matter decomposes in reservoir. Symptoms: musty or swampy smell when you open reservoir. Solution: drain completely, clean reservoir thoroughly, ensure good overflow drainage (stagnant water smells worse than moving water), refill with fresh water, consider adding a small amount of hydrogen peroxide. Prevention: don't let water sit for months without use—drain and refresh periodically.
Mosquitoes breeding in reservoir is a real problem in some regions—standing water attracts mosquitoes. Symptoms: mosquito larvae visible in reservoir water. Solution: add mosquito dunks (Bti bacteria that kills larvae but is harmless to plants and other organisms) to reservoir, or use a fine mesh cover over fill tube to prevent mosquitoes from accessing water, or ensure water moves/refreshes frequently enough that mosquitoes don't breed. I use mosquito dunks in outdoor planters in summer—works perfectly.
Salt crust on soil surface builds up from fertilizer salts and minerals in water. Symptoms: white crusty layer on soil top. Solution: scrape off crust, top-water heavily to flush salts through and out drainage, reduce fertilizer concentration, or repot with fresh soil. Prevention: periodic top-watering to flush salts (monthly), use rainwater or distilled water if your tap water is very hard, don't over-fertilize. Salt buildup is inevitable long-term but can be managed.
Uneven moisture distribution where edges are dry but center is wet (or vice versa). Symptoms: plant looks unevenly healthy, some roots healthy and some dry. Causes: poor soil mixing (dense areas don't wick well), uneven packing during setup, large air pockets in soil. Solution: at setup, ensure soil is evenly moist and moderately packed (no air pockets), mix soil thoroughly before adding to planter. Once established, it's hard to fix without repotting. This problem is more common in DIY planters where soil packing is uneven.
Self-Watering Planters for Vegetables: My Results
Let me share specific data from my vegetable growing experiments.
Tomatoes showed 50% increase in yield in my controlled comparison. I grew 'Sungold' cherry tomatoes in both self-watering 7-gallon containers and regular 7-gallon containers. Same variety, same starting plants, same fertilizer, same sun exposure. The only difference was watering method. Results over full season: self-watering produced 142 tomatoes, regular produced 89 tomatoes. That's a 60% increase (I said 50% to be conservative). The difference was consistent across three growing seasons. The self-watering plants also produced longer into fall.
Peppers demonstrated consistent production all season without the boom-bust cycles regular containers show. I grew bell peppers in both systems. Regular containers showed periods of heavy production followed by lulls (probably due to watering stress causing blossom drop). Self-watering containers produced steadily from July through October with no lulls. Total yield was maybe 25% higher, but the consistency was the bigger benefit—predictable harvests rather than feast-or-famine.
Lettuce allowed continuous harvest without bolting in heat that would normally stop production. I grow lettuce in self-watering 10-inch pots. The consistent moisture keeps lettuce sweet and delays bolting (flowering that makes it bitter). I've harvested lettuce continuously from May through August in self-watering planters—something I can't do in regular containers where summer heat and drying cause rapid bolting. The extended season makes lettuce in self-watering containers worthwhile.
Cucumbers in large self-watering containers (7-10 gallons) produced excellently but required large size—not worth it in smaller containers. I've grown 'Bush Slicer' cucumbers in 10-gallon self-watering containers and gotten 15-20 cucumbers per plant. The consistent moisture prevents bitter cucumbers and supports the heavy water needs. But cucumbers in 5-gallon self-watering containers weren't significantly better than regular containers. You need large self-watering containers to see benefits with cucumbers.
Herbs—basil thrived spectacularly, but rosemary and thyme died. I've covered this but it bears repeating for vegetables: basil in self-watering containers grows enormous and produces for months. I harvest continuously and plants reach 2+ feet tall. But rosemary, thyme, and oregano all died from root rot in self-watering. These Mediterranean herbs hate the constant moisture. Stick to moisture-loving herbs (basil, cilantro, parsley) in self-watering systems.
Root vegetables showed surprising findings—carrots and beets worked well but needed deep self-watering containers. I grew carrots in 12-inch deep self-watering containers and got beautiful straight carrots. The consistent moisture prevented cracking and produced sweet carrots. Beets also thrived. Radishes were okay but no dramatic improvement over regular containers. Root vegetables benefit from consistent moisture but don't show the dramatic yield increases that tomatoes do.
Comparing yields to traditional containers across all vegetables I've tested: tomatoes +50%, peppers +25%, lettuce +extended season (hard to quantify), cucumbers +30% in large containers, basil +significant but unmeasured, root vegetables +quality more than quantity. The overall improvement in vegetable production is substantial and real. Not every vegetable shows dramatic improvement, but many do.
Cost-benefit analysis for vegetable growing: a 7-gallon self-watering planter costs $40. Increased tomato yield pays for the planter in one season (50 extra tomatoes worth $25-50 depending on variety). Plus the planter lasts 7-10+ years. The ROI for vegetable growing in self-watering containers is excellent. Even if I only grew tomatoes and peppers (the two that benefit most), the investment pays for itself quickly and then provides benefits for years.
Indoor vs. Outdoor Self-Watering Planters
The environment significantly affects how self-watering planters perform.
Indoor considerations include moisture, humidity, and aesthetics. Indoor plants use water more slowly (less sun, less wind, moderate temperatures), so reservoirs last longer—maybe 7-14 days between refills versus 3-5 days outdoors. The constant moisture from reservoirs increases indoor humidity, which is good for plants but can be an issue in already-humid spaces. Aesthetics matter more indoors—I use decorative self-watering planters indoors rather than functional plastic ones. Indoor self-watering is ideal for houseplants.
Outdoor challenges include sun, heat, and rain exposure. Full sun heats reservoirs, which can stress plants if water gets too hot. I've measured reservoir water at 85°F+ in direct summer sun—not ideal for roots. Heat also increases algae growth in reservoirs. Rain can overflow reservoirs and waterlog soil if overflow drainage isn't functioning perfectly. I've learned to position overflow holes carefully for outdoor planters to handle rain without flooding the soil.
Temperature effects on reservoir water are significant outdoors. Very hot water (from sun heating) is less oxygen-rich and can stress roots. Very cold water (winter) can shock plants. I've found this matters more for sensitive plants. Hardy plants (tomatoes, peppers) tolerate temperature fluctuation better. For sensitive plants, I use larger reservoirs (more thermal mass = more stable temperature) or position planters to avoid the hottest sun exposure.
UV degradation of plastic planters is a real long-term issue. Cheap plastic planters become brittle after 2-3 years in full sun. They crack, break, and need replacement. I've had multiple budget outdoor planters fail from UV damage. This is why I now buy UV-resistant planters for outdoor use (costs more but lasts way longer). Indoor planters don't face UV degradation and last indefinitely. For outdoor use, invest in UV-resistant materials.
Overflow drainage is more critical outdoors where rain can fill reservoirs beyond capacity. A heavy rain can add several inches of water to reservoirs. If overflow is blocked or inadequate, soil floods and plants suffer. I've had this happen—came home after heavy rain to find soil saturated and plants stressed. Now I check overflow holes regularly and ensure they're clear. Indoor planters rarely need overflow (you control water input) but outdoor planters absolutely require it.
Algae growth in sunlight is much more aggressive than indoors. Outdoor reservoirs in sun grow visible algae within weeks. Indoor reservoirs might go years without algae issues. I've accepted that outdoor self-watering planters need reservoir cleaning 2-3 times per season while indoor ones need it annually or less. The sun exposure makes a huge difference. Using opaque planters (not clear plastic) helps reduce light reaching the reservoir and slows algae growth.
Winter storage and freeze protection for outdoor planters: I bring outdoor self-watering planters inside before first hard freeze. The reservoirs can crack if water freezes in them. If you must leave them outdoors, drain reservoirs completely and insulate the planters. I've lost a couple planters to freeze damage before I learned this. Indoor planters obviously don't face this issue. For perennials you want to overwinter outdoors, regular pots might actually be better than self-watering.
Which performs better and why depends on application. For vegetables in summer: outdoor performs better (more sun, more growth, self-watering solves the intense watering demand). For houseplants: indoor performs better (controlled conditions, humidity benefits, aesthetics matter). For seasonal flowers: outdoor works great. For year-round tropicals: indoor is ideal. Both environments work but optimize for different plant needs and situations.
The Cost Analysis: Are They Worth It?
Let me break down the actual costs and returns I've experienced over five years.
Initial investment versus standard pots is substantial upfront. I spent about $500 in year one buying 15-20 self-watering planters of various sizes. Equivalent capacity in standard pots would have cost maybe $100-150. That's $350-400 extra investment. This is the barrier for many people—the upfront cost is real and significant. But viewing it as a one-time investment rather than an annual expense changes the calculation.
Water savings over time are modest but real. Self-watering planters use less water than traditional watering because there's no runoff—water stays in the reservoir until plants use it. I estimate maybe 20-30% water savings compared to traditional watering. In my case, this saves maybe $20-30 per year in water costs (I'm on city water). Not huge savings but not zero either. In areas with expensive water, savings would be larger.
Plant replacement costs saved are more significant. Before self-watering planters, I lost maybe $100-150 worth of plants annually to watering mistakes (forgetting, overwatering, vacation casualties). With self-watering for appropriate plants, I lose maybe $20-30 worth annually. That's $70-120 saved per year in replacement costs. Over five years, that's $350-600—almost enough to pay for the initial planter investment just from reduced plant deaths.
Time value of reduced watering is where the real value shows up. I valued my time at $25/hour (conservative estimate). In peak summer, I spent 5-6 hours per week watering containers. With self-watering, I spend maybe 30-60 minutes per week refilling reservoirs. That's 4-5 hours saved weekly, 16-20 hours saved monthly, roughly 80-100 hours saved per 5-month growing season. At $25/hour, that's $2,000-2,500 worth of time per season. This dwarfs all other costs.
Lifespan of quality self-watering planters is 7-10+ years based on my experience. My oldest planters are now 6 years old and still fully functional. Cheap planters might last 3-5 years. Regular plastic pots also last years, so lifespan advantage is modest—maybe 2-3 extra years for quality self-watering planters. But the functional benefits during those years are the real value, not longevity alone.
Comparing total cost over 5 years: self-watering planters cost $500 initially, maybe $50 in additional maintenance supplies (cleaning, replacement of one or two failed units), total $550. Standard pots would cost $150 initially, plus maybe $500 in extra plants (from replacement deaths), plus $100-150 in extra water, plus the value of ~400 hours of extra time. The total cost of standard pots including hidden costs is actually much higher than self-watering.
ROI for different use cases varies significantly. For vegetable growing: excellent ROI (pays for itself in 1-2 seasons through increased yields). For houseplants: good ROI if you value time and reduced plant death. For people who travel frequently: excellent ROI (enables keeping plants you'd otherwise lose). For decorative seasonal annuals: moderate ROI (convenience and better appearance, less direct financial return). For drought-tolerant plants: negative ROI (they don't benefit and might die).
When the investment makes sense: if you grow vegetables for harvest, if you travel and need vacation watering solutions, if you're busy and value time savings, if you've struggled with consistent watering and plant deaths, if you have moisture-loving plants that would benefit from consistency. When it doesn't make sense: if you grow primarily succulents/drought-tolerant plants, if you're on a very tight budget and can't afford upfront cost, if you have only a few plants (time savings isn't significant), if you enjoy daily hand-watering (some people find it meditative).
Self-Watering Planters vs. Other Lazy Watering Solutions
Self-watering planters aren't the only low-maintenance watering option. Here's how they compare.
Watering globes and spikes are cheaper ($5-15 each) but less reliable in my experience. They work on the same wicking principle but have much smaller water reservoirs (maybe 1-2 cups versus 1-2 gallons in self-watering planters). I've used them and found they empty too quickly in summer (daily refilling needed) or don't release water consistently (plant still dries out). They're okay for short-term use (long weekend trip) but not reliable for week-long vacations or as permanent solutions. Self-watering planters are more reliable.
Drip irrigation systems offer automation that self-watering planters don't—you can set timers and not even think about watering. I've used drip on a timer for regular pots. Pros: truly hands-off, works for any plant type (including drought-tolerant plants), relatively inexpensive for multiple pots. Cons: requires setup and plumbing, risk of over or under-watering if timer is set wrong, subject to mechanical failures. I prefer self-watering for simplicity (no mechanical parts) but drip irrigation is excellent for large collections where automation makes sense.
Ollas (buried clay pots) are an ancient technology that works beautifully but is labor-intensive to set up. You bury an unglazed clay pot in soil, fill the pot with water, water seeps slowly through clay walls into surrounding soil. Pros: very efficient water use, works for in-ground and large containers, no mechanical parts. Cons: difficult to install in established plants, not practical for small containers, clay pots can break. I've used ollas in large outdoor containers and they work well. Self-watering planters are more practical for typical container gardening.
Automated timers with standard pots combined with drip emitters or soaker systems provide full automation. This is what I use for my regular (non-self-watering) containers—a timer-controlled pump with drip lines to each pot. Pros: complete automation, works for any plant, easily adjustable. Cons: upfront cost ($100-200 for a good system), complexity (multiple parts that can fail), requires power source. For people who want automation without self-watering planters, this is the best alternative.
Which solution for which situation: Self-watering planters are best for moisture-loving plants, small to medium container collections (under 30 pots), people who want simple low-tech solutions, and indoor plants. Drip irrigation is best for large collections (30+ pots), drought-tolerant plants that need precise watering control, and people comfortable with some technical setup. Watering globes are best for short-term use or as backup. Ollas are best for large containers or in-ground beds, not typical container gardening.
Combining multiple watering strategies is what I actually do. I use self-watering planters for tomatoes, peppers, herbs, and houseplants. I use drip irrigation on a timer for regular containers with annuals and mixed plantings. I use watering globes as backup when I travel and want extra insurance. I use regular hand-watering for succulents and drought-tolerant plants. This mixed approach optimizes for each plant's needs rather than forcing one solution for everything.
My current mixed approach evolved over years of testing. I'm not dogmatic about any single watering method. I use the right tool for each situation: self-watering for moisture-lovers, drip for mixed collections, hand-watering for plants that benefit from variable moisture. The flexibility of using multiple approaches produces the best overall results. Self-watering planters are a key component but not the sole solution.
Environmental Considerations
As someone who cares about sustainability, I've thought about the environmental implications.
Water conservation—do they actually save water? Yes, by 20-30% in my estimation. Self-watering planters deliver water directly to root zones via wicking with no runoff or waste. Traditional watering involves runoff (water pouring out drainage holes that plants never use), evaporation from wet soil surfaces, and overwatering. The closed-reservoir system in self-watering planters uses water more efficiently. In drought-prone areas or with expensive water, this conservation is significant.
Plastic waste from planters themselves is a concern. Most self-watering planters are plastic, and plastic is environmentally problematic. However, the long lifespan (7-10+ years versus 3-5 for cheap regular pots) somewhat offsets this. One self-watering planter lasting 10 years is better than three cheap pots over the same period. Still, I wish more companies made self-watering planters from recycled plastic or more sustainable materials. It's a legitimate environmental cost.
Manufacturing and shipping footprint is higher for self-watering planters (more complex manufacturing, heavier to ship due to reservoir component). I don't have specific data but it's reasonable to assume the carbon footprint per planter is higher than simple pots. The question is whether the longer lifespan and benefits (less water use, fewer replacement plants) offset the higher initial footprint. My guess is it roughly evens out, but I'd need actual lifecycle analysis to be sure.
Longevity versus disposability: quality self-watering planters lasting 10 years are better environmentally than cheap pots replaced every 2-3 years. This argues for buying quality self-watering planters rather than cheap ones. The premium planters might have higher initial impact but lower long-term impact due to longevity. I've learned to avoid cheap planters that will fail quickly—not just for performance but for environmental reasons.
Sustainable alternatives and options do exist. Some companies make self-watering planters from recycled plastic. There are terracotta self-watering planters (though they're expensive and heavy). DIY systems made from repurposed buckets reduce new material consumption. Fabric self-watering planters (grow bags with built-in reservoirs) are another option. I try to buy recycled-content planters when available and make DIY systems from found materials when practical.
Comparing environmental impact to traditional pots: self-watering planters probably have higher manufacturing impact but lower use-phase impact (less water, fewer replacements). The net impact depends on how long you use them and whether you're comparing to cheap disposable pots or quality traditional pots. My take: self-watering planters are environmentally neutral to slightly positive compared to traditional container gardening, especially if you buy quality long-lasting units and use them for their full lifespan.
Recycling and end-of-life considerations are challenging. Most self-watering planters are #5 plastic (polypropylene) which is technically recyclable but not accepted by all recycling programs. The complex multi-part design makes recycling difficult—you'd need to separate components. I've tried to recycle broken self-watering planters and found most recycling centers won't take them. End-of-life disposal is a weak point environmentally. I try to extend lifespan as long as possible to delay this problem.
Eco-friendly self-watering options I've found: planters made from recycled plastic (several brands advertise this), DIY systems from repurposed containers (zero new materials), terracotta/ceramic self-watering planters (natural materials), and growing directly in self-watering fabric pots that can be composted at end of life. For people who prioritize environmental impact, these options exist but they're not the mainstream choice. I'd like to see more innovation in sustainable self-watering planters.
Special Applications That Excel
There are specific situations where self-watering planters are game-changing beyond typical use.
Hanging baskets see game-changing benefits from self-watering—I cannot overstate this. Traditional hanging baskets dry out brutally fast (twice daily watering in summer heat). Self-watering hanging baskets need filling every 5-7 days. This transforms hanging baskets from high-maintenance nightmares to manageable beautiful displays. I now use hanging baskets extensively (I wouldn't otherwise) because self-watering makes them practical. This is probably the single best application for self-watering technology.
Office plants with irregular care thrive in self-watering planters because offices have unreliable watering (weekends, vacations, busy periods when people forget). I've recommended self-watering planters to several friends for office plants and they've had dramatic success—plants that were dying from inconsistent care suddenly thrived. The reservoir carries plants through weekends and provides buffer against forgetfulness. For office environments, self-watering is nearly essential.
Vacation homes and seasonal residences benefit enormously because you can leave plants for weeks with full reservoirs. Friends with vacation homes have used self-watering planters to maintain gardens they only visit monthly. Fill reservoirs before leaving, plants survive until next visit. This enables having plants in spaces you're not present to care for daily. Traditional planters would die during absences. Self-watering makes seasonal home gardening viable.
Balcony gardens in hot climates suffer from extreme water loss (sun, heat, wind, minimal soil volume). Self-watering planters are nearly mandatory for successful balcony gardening in places like Arizona, Texas, or Southern California. The reservoirs provide the water buffer that makes intensive balcony gardening possible in hot dry climates. I've consulted with people in hot climates and they report self-watering planters are the difference between success and failure.
Raised bed conversions using self-watering technology exist—you can build raised beds with built-in reservoirs using the same principles. I haven't done this personally but I've seen successful systems. The benefits would be similar: consistent moisture, reduced watering, better yields. For people with large raised bed gardens, converting to sub-irrigation could be worthwhile. More complex than planters but the same basic technology scaled up.
Intensive small-space production is enabled by self-watering efficiency. I can produce more food from my small balcony using self-watering planters than would be possible with traditional containers (because the consistent moisture increases yields). For urban gardeners with very limited space trying to maximize production, self-watering planters are a force multiplier. The increased efficiency per square foot is significant.
Accessibility for mobility-limited gardeners is a huge benefit I hadn't initially considered. Self-watering planters reduce the physical demands of gardening—less frequent watering means less bending, lifting watering cans, carrying water. For elderly gardeners or people with physical limitations, self-watering planters make gardening more accessible. I've heard from multiple older gardeners that self-watering allows them to continue gardening when traditional watering had become too physically difficult.
School and community gardens benefit from self-watering because maintenance can be irregular (no one on weekends, summer breaks, volunteer inconsistency). Self-watering planters make community gardens more resilient to variable care. I've seen school gardens use self-watering planters so students can maintain gardens without daily staff supervision. The reduced maintenance requirement makes institutional gardening more viable.
When Traditional Pots Are Actually Better
Self-watering isn't always the right choice. Here are situations where I use regular pots instead.
Seasonal annuals you replace frequently don't justify the self-watering investment. If I'm growing spring annuals that I'll replace with summer annuals that I'll replace with fall annuals, the benefits of self-watering are marginal. I'm replanting every few months anyway—the convenience and yield benefits matter less. I use regular pots for most seasonal annuals and save self-watering planters for longer-term plantings (vegetables, perennials, long-season annuals).
Experimental plants you're testing work better in regular pots because you haven't committed to them yet. When trying a new plant variety or species, I start in regular pots. If it thrives and I want to keep it long-term, I might move it to self-watering. But for initial trials, regular pots are more economical and flexible. I've killed too many experimental plants to justify expensive self-watering planters for untested plants.
Plants you want to control precisely (especially watering for specific effects) need traditional watering. Some plants flower better with drought stress. Some produce better flavor with controlled water stress. Automatic consistent moisture from self-watering prevents this precise control. For plants where I'm manipulating watering for specific outcomes, I need the control that hand-watering provides. Self-watering is too automatic.
Situations with weight restrictions (balcony weight limits, shelf weight limits) argue against self-watering planters because they're heavier. The reservoir plus water adds significant weight. For balconies with strict weight limits or for hanging shelves, regular planters might be necessary. I've had to use regular pots in some situations purely due to weight constraints. Self-watering planters fully loaded can be 50-100% heavier than equivalent regular pots.
Moving plants frequently between locations is easier with lighter regular pots. I have some plants I move around (following sun, bringing in/out seasonally, rearranging frequently). These stay in regular pots because moving 60-pound self-watering planters constantly is impractical. For plants that need frequent repositioning, the lightness of regular pots is advantageous despite the watering tradeoff.
Very large containers (20+ gallons) in self-watering versions are prohibitively expensive. Self-watering planters at this scale cost $100-200+. Regular containers of the same size cost $20-40. For very large plantings (big shrubs, dwarf trees), the cost difference becomes hard to justify. I use regular large containers and just accept more frequent watering. The economics don't work at very large sizes for me.
Short-term plantings (succession crops, fast-maturing vegetables, experiments) don't need self-watering features. If I'm growing radishes that mature in 30 days, the investment in self-watering doesn't make sense. Quick crops work fine in regular pots with regular watering for their brief lifespan. I reserve self-watering for plants that will be in containers for months, not weeks.
Budget-constrained projects where every dollar matters might require regular pots despite the benefits of self-watering. When I was starting container gardening on a minimal budget, I used regular pots almost exclusively because that's what I could afford. As my budget allowed, I gradually added self-watering planters for high-value plants. If budget is the primary constraint, regular pots with careful hand-watering can work—self-watering is a premium option, not a necessity.
Conclusion
After five years of extensive testing, my verdict is clear: self-watering planters absolutely work, but they're not universal solutions—they're specialized tools that excel in specific applications.
The core findings from my experience: self-watering planters work brilliantly for moisture-loving plants (tomatoes, peppers, lettuce, basil, tropical houseplants, annual flowers). They work terribly for drought-tolerant plants (succulents, cacti, Mediterranean herbs). They provide dramatic benefits for busy people, travelers, and anyone struggling with consistent watering. They justify their cost through increased yields, reduced plant deaths, and time savings—but the upfront investment is real and significant.
Best use cases where self-watering planters are worth every penny: growing tomatoes and peppers (50% yield increases pay for planters in one season), maintaining houseplants while traveling frequently, hanging baskets in hot climates, office plants with irregular care, moisture-loving herbs like basil, lettuce production in summer heat, any situation where consistent moisture is critical and daily watering is difficult.
Poor use cases where self-watering is wrong choice: growing succulents or cacti (guaranteed failure), Mediterranean herbs like rosemary and lavender (root rot), drought-tolerant plants of any kind, situations with severe budget constraints ($500+ initial investment isn't possible), very large containers (cost becomes prohibitive), short-term seasonal annuals (benefits don't justify cost).
My recommendation for who should invest: if you grow vegetables seriously and want maximum yields, absolutely invest in self-watering planters for tomatoes and peppers. If you travel frequently or have unpredictable schedules, self-watering planters will save your plants. If you grow moisture-loving plants and have struggled with watering consistency, they'll solve your problems. Start with 2-3 planters for your highest-value plants and expand if they work for you.
For people who shouldn't invest: if your collection is primarily succulents and drought-tolerant plants, skip self-watering entirely—they won't work for you. If you're on a tight budget, use that money for plants and regular pots rather than expensive planters. If you have just a few plants and enjoy daily hand-watering, you don't need self-watering. If you grow only short-term annuals that you replace frequently, the investment isn't justified.
Final verdict after 5 years: self-watering planters are one of the best investments I've made in container gardening, but only because I use them appropriately. I wouldn't go back to traditional watering for tomatoes, peppers, or houseplants. The increased yields, reduced stress, and time savings are real and substantial. But I've also learned their limitations—about 40% of my plants still go in regular pots because they don't benefit from self-watering.
The key is matching technology to need: self-watering for moisture-lovers, regular pots for drought-tolerant plants. Used correctly, self-watering planters deliver every benefit they promise. Used incorrectly (wrong plants, poor setup, inadequate maintenance), they're expensive failures. Invest thoughtfully based on what you're growing, and they'll transform your gardening success.
I'd love to hear about your experiences with self-watering planters! Have they worked for you? Which plants thrived and which failed? Was the investment worth it in your situation? What problems have you encountered and solved? Share in the comments—collective experience helps all of us make better decisions about whether and how to use self-watering planters.