Beginner's Guide to Hydroponic Gardening in an Apartment: Everything You Need to Start Growing
The complete beginner's guide to hydroponic gardening in an apartment — systems, nutrients, lighting, and the best plants to grow. Real advice from someone who started with zero experience.
TINY PLOT BEGINNERS: YOUR FIRST HARVEST STARTS HERE
Introduction
Here's something that floored me the first time I read it: plants grown hydroponically can grow up to 50% faster and produce up to 30% more yield than the same plants grown in soil — using roughly 90% less water in the process. Fifty percent faster. Ninety percent less water. In a soil pot. Those numbers sound like marketing copy but they're backed by decades of commercial hydroponic research, and the reason behind them is actually pretty intuitive once you understand the basic principle: instead of forcing plant roots to search through soil for nutrients, hydroponics delivers those nutrients directly to the roots in water, exactly when and in exactly the concentrations the plant needs them. The plant spends almost no energy on root foraging and almost all of it on growth. The results are genuinely remarkable.
I came to hydroponics the way a lot of apartment gardeners do — through frustration. I was growing herbs in soil on my kitchen counter, the light wasn't great, the soil was always either too wet or too dry, and my basil looked like it was slowly giving up on life. A friend suggested I try a simple hydroponic setup and walked me through the basics. I started with a mason jar, some net cups, some basic nutrients, and a bag of clay pebbles. It cost maybe fifteen dollars. Within three weeks I had the healthiest, most productive basil I'd ever grown in my apartment, and I was completely converted.
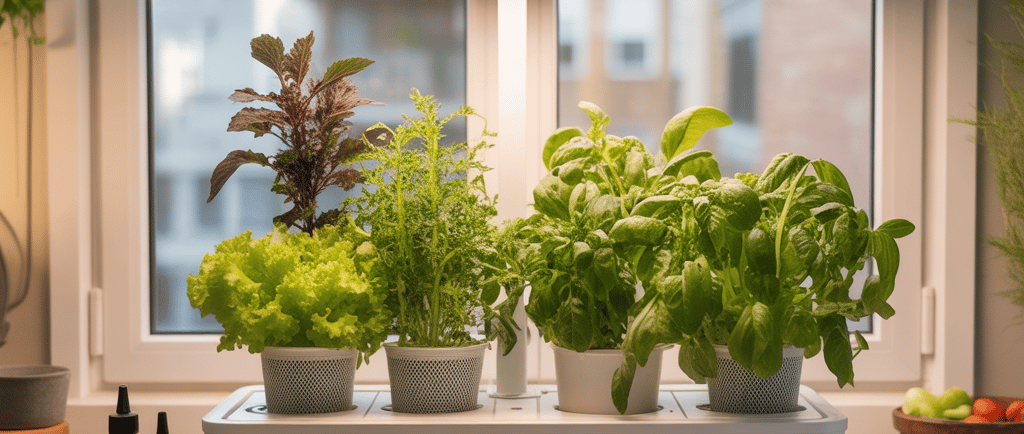
The word "hydroponics" puts a lot of people off because it sounds technical and complicated and like something that requires a science background to manage. It genuinely doesn't. The core principles are simple — water, nutrients, light, oxygen — and the range of hydroponic systems available in 2026 runs from "mason jar on a windowsill" to "fully automated vertical tower with app monitoring." There's an entry point for every level of interest, budget, and available space. This guide covers everything you need to know to start growing hydroponically in your apartment — in plain language, with real product recommendations, and with the honest acknowledgment of what's easy and what takes more attention. Let's grow something without soil.
What Is Hydroponics and Why It's Perfect for Apartment Growing
Hydroponics is, at its most basic, growing plants in nutrient-enriched water instead of soil. The roots are supported in some kind of growing medium — clay pebbles, rockwool, coco coir, or sometimes nothing at all — that holds the plant upright and maintains some moisture around the root zone, but the actual nutrients the plant needs come entirely from the water solution surrounding the roots. There's no soil involved, no soil biology, no soil-based nutrient cycling — just water, dissolved nutrients, light, and air. That simplicity is both the technical explanation of what hydroponics is and the core reason why it works so well in apartment settings.
The growth speed advantage of hydroponics over soil isn't magic — it's mechanics. In soil, a plant's roots spend a significant portion of the plant's energy budget physically growing through soil in search of nutrients and water. That energy comes from photosynthesis, which means it's energy that could otherwise go into leaf production, stem development, and fruit development. In a hydroponic system, nutrients are delivered directly to the roots in dissolved form, suspended in the water that constantly surrounds them. The plant's roots don't need to go looking for anything. All of that foraging energy redirects into growth, which is why hydroponic plants grow dramatically faster than their soil-grown counterparts under the same light and temperature conditions.
For apartment growing specifically, hydroponics has practical advantages beyond growth speed that matter a lot in small living spaces. Hydroponic systems are genuinely cleaner than soil growing — no potting mix tracking across floors, no fungus gnats breeding in moist soil, no soil-borne diseases or pests. The systems are contained and tidy. Watering is either automated or dramatically simplified compared to the daily attention that soil containers in dry apartment air often need. The space efficiency is extraordinary — a vertical hydroponic tower can produce the equivalent yield of a much larger area of soil containers. And the control is unmatched — you know exactly what nutrients your plants are receiving, in what concentrations, at what pH, and you can adjust any of those variables precisely in ways that soil growing simply doesn't allow.
The cleanliness advantage is something I didn't fully appreciate until I experienced it. Moving from soil growing to hydroponics in my apartment eliminated the fungus gnat problem I'd been dealing with for years — those tiny flies breed in moist soil and are essentially endemic to indoor soil growing in apartments. It eliminated the mess of soil on my counter and floor. It eliminated the inconsistency of soil moisture that had been stressing my plants and frustrating me. My apartment genuinely felt cleaner and more manageable with a hydroponic setup than with an equivalent number of soil containers, and that quality-of-life improvement has been one of the most consistently appreciated aspects of the switch.
The Best Hydroponic Systems for Apartment Beginners
There are several different hydroponic system types, each with different operating principles, different complexity levels, and different suitability for apartment growing. Understanding the options at a conceptual level before choosing one prevents the common mistake of starting with a system that's more complex than necessary and becoming overwhelmed before experiencing the rewards.
Deep Water Culture — DWC — is the system I recommend to most beginners because it's the simplest active hydroponic approach to understand and set up. Plants sit in net pots suspended in a reservoir of nutrient solution, with their roots dangling directly into the nutrient water. An air pump and air stone — exactly like those in a fish tank — bubble oxygen through the solution, providing the dissolved oxygen that roots need to stay healthy and preventing the stagnant water conditions that cause root rot. The mechanics are straightforward, the required components are few and cheap, and the system is forgiving of beginner mistakes in a way that more complex systems aren't. A basic DWC setup can be assembled from a five-gallon bucket, a lid with net cup holes, an air pump, air tubing, an air stone, some clay pebbles, and nutrient solution — total cost around twenty to thirty dollars for the hardware.
The Kratky method is my absolute top recommendation for the very first hydroponic experiment, and it's so simple it almost doesn't feel like it counts as hydroponics. Kratky is a passive DWC variant — passive meaning no pump, no electricity, no moving parts whatsoever. You fill a container with nutrient solution, suspend a plant in a net cup in the solution with the roots touching the water, and leave a gap of air between the water surface and the bottom of the net cup. As the plant drinks the nutrient solution, the water level drops, increasing the air gap and creating an air-exposed root zone alongside the submerged root zone. This dual root zone — part in water for nutrient uptake, part in air for oxygen — supports vigorous growth without any mechanical assistance. A Kratky lettuce setup in a mason jar costs essentially nothing beyond seeds and a small amount of nutrients and produces genuinely impressive results. It's where I recommend every beginner start.
Nutrient Film Technique — NFT — is a step up in complexity and a step up in capability. In an NFT system, a thin film of nutrient solution flows continuously along the bottom of slightly tilted channels or pipes, over the root tips of plants suspended above in net pots. The roots are never fully submerged — they grow down through the net pot, with their tips touching the flowing film of nutrients while the upper root zone is exposed to air. NFT systems are efficient with nutrients and water, handle larger plant numbers well, and are the basis of many commercial hydroponic operations. For apartment beginners, they're worth considering if you want to grow more plants than a simple DWC bucket allows — but the pump, reservoir, channels, and return plumbing represent more complexity and more potential failure points than DWC or Kratky.
Ebb and flow systems — also called flood and drain — periodically flood a growing tray with nutrient solution and then drain it back to a reservoir on a timer. Plants sit in the growing tray in net pots filled with growing medium, receiving nutrients when the tray floods and oxygen to their roots when it drains. The periodic flooding and draining cycle creates alternating wet and dry conditions that many plants respond to vigorously. The system requires a timer, a pump, a reservoir, a growing tray, and the plumbing to connect them — more components and complexity than DWC or NFT. I'd recommend ebb and flow to apartment growers who've had success with simpler systems and want to scale up or try larger fruiting plants.
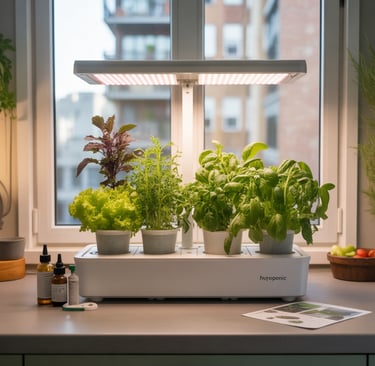
All-in-one countertop systems deserve their own detailed discussion — I'll cover the major brands in the next section — but the brief summary here is that they're the most beginner-friendly entry point because they come with everything you need, require minimal setup, and often include seed pods and nutrients to get started immediately. The trade-off is cost relative to performance and the limitations imposed by proprietary consumable systems — but for the right beginner, they're an excellent starting point that removes virtually all of the setup and configuration decisions.
All-in-One Hydroponic Systems — The Easiest Starting Point
All-in-one countertop hydroponic systems have become increasingly sophisticated and genuinely impressive since the early AeroGarden days, and in 2026 there's a solid range of options at different price points and with different design priorities. For beginners who want to start growing immediately without building anything or making component decisions, they're the right starting point.
AeroGarden is the brand that essentially created the consumer countertop hydroponic category and remains the most recognized name in the space. Their systems use a proprietary pod design — small soil-and-seed pods that drop into the system — with an integrated LED grow light on an adjustable arm above the growing bowl. The nutrient delivery is automated through a pump that circulates solution through the base, and the control panel (or app in connected models) manages light schedules and provides nutrient reminder prompts. The AeroGarden Harvest, their entry-level six-pod model, is genuinely a good starter system — compact enough for a kitchen counter, easy to set up, and capable of producing a meaningful harvest of herbs or lettuce with very little effort. The AeroGarden Bounty expands to nine pods with a larger light and greater growing height, suitable for basil and some fruiting plants. The main criticism of AeroGarden is the ongoing cost of their proprietary seed pods — buying pre-loaded pods rather than using your own seeds adds up quickly. The workaround — purchasing empty pods and using your own seeds with generic hydroponic nutrients — is widely documented in the AeroGarden community and dramatically reduces ongoing costs.
Click and Grow takes a different approach than AeroGarden, using a soil-based medium in their pods rather than a purely hydroponic system — technically making it more of a self-watering planter than true hydroponics, though the practical growing experience is similar for beginners. Their Smart Garden 3, 9, and 27 models scale from a three-pod countertop setup to a substantial twenty-seven-pod floor-standing unit. Click and Grow's design quality is notably higher than AeroGarden's — the systems are genuinely attractive objects that look appropriate in a well-designed kitchen or living space. The same pod cost concern applies as with AeroGarden, and the same DIY workaround is available. For the design-conscious apartment grower who wants something that looks as good as it grows, Click and Grow is worth the slight premium over AeroGarden.
iDOO hydroponic systems have gained significant traction in recent years as a more affordable alternative to AeroGarden that performs comparably for most growing applications. Their twelve-pod and twenty-pod systems offer more growing capacity than AeroGarden's entry models at competitive prices, with similar automatic pump and light systems. The build quality is slightly below AeroGarden — the materials feel a bit cheaper and the light arm mechanism is less refined — but the actual growing performance is comparable for herbs and lettuce. For budget-conscious beginners who want an all-in-one system with more pod capacity than the AeroGarden Harvest, iDOO is a genuine value option worth considering.
Lettuce Grow's Farmstand is a different animal from the countertop systems — it's a vertical tower system available in sizes from twelve to thirty-six plant sites, designed to stand on a floor or patio rather than sit on a counter. The Farmstand uses a recirculating system that pumps nutrient solution up through the tower and allows it to drain back down through the plant sites, delivering nutrients to roots throughout the cycle. The result is impressive growing capacity in a compact footprint — a thirty-six-site Farmstand produces a remarkable amount of food relative to its floor space. It requires a grow light attachment (sold separately) for indoor use, which adds to the cost but enables year-round indoor growing. For apartment gardeners who want to take indoor food production seriously and have the floor space for a tower, the Farmstand is the most productive all-in-one system currently available at consumer scale.
DIY Hydroponic Systems for Apartments — Building Your Own
Building your own hydroponic system might sound intimidating but it's genuinely one of the most accessible DIY projects in the indoor gardening world — the required materials are cheap and widely available, the construction is simple, and the knowledge gained from building and operating your own system is significantly deeper than what you gain from using an all-in-one. For anyone who wants to understand what's actually happening in their hydroponic system rather than just following a machine's prompts, DIY is the right path.
The basic DWC bucket system is the classic DIY entry point and it's almost comically straightforward to build. You need a five-gallon bucket with a lid — dark colored or painted opaque to prevent algae growth — a two-inch hole saw for cutting net cup holes in the lid, two-inch net cups, an aquarium air pump rated for the bucket volume, flexible air tubing, and a small air stone. Total hardware cost from Amazon or a hardware store is typically fifteen to twenty-five dollars. You fill the bucket with nutrient solution to just below the bottoms of the net cups, fill the net cups with clay pebbles and your seedlings, connect the air pump and air stone, plug it in, and you're growing hydroponically. The air stone oxygenates the solution and keeps roots healthy. As plants grow, their roots extend down through the net cups into the solution. It really is that simple.
The Kratky mason jar system is even simpler and my favorite introduction for people who are skeptical that hydroponics can really be as easy as claimed. You need a wide-mouth mason jar — at minimum a quart size, ideally a half-gallon — a two-inch net cup that fits the jar mouth (these are widely available online for cents each), clay pebbles, a small seedling or germinated seed, and mixed nutrient solution. Fill the jar with nutrient solution to just touching the bottom of the net cup when placed in the jar mouth. Add the seedling in the net cup with clay pebbles holding it upright. Cover the jar with something opaque if the jar isn't opaque itself — a sleeve of black electrical tape, a fabric cover, a painted jar — to prevent algae. Place it somewhere with adequate light or under a grow light. As the plant drinks the solution, the water level drops naturally and the root zone adjusts. Top up with plain water — not full nutrient solution — when levels get low. That's genuinely the entire system. I've grown beautiful lettuce, basil, and chives in Kratky mason jars and it remains my favorite demonstration of how accessible hydroponics really is.
Building a simple NFT system requires a bit more effort and investment but opens up significantly more growing capacity. The core components are: a reservoir (a standard storage tote works perfectly), a submersible pump, flexible tubing to carry solution from the reservoir to the elevated end of the growing channels, PVC pipe or purpose-made NFT channels as the growing surface, net cups to hold plants in the channels, and a return path (the channels simply drain back into the reservoir by gravity). The pump runs on a timer — on for short intervals to circulate solution, off for rest periods — though many apartment-scale NFT growers run the pump continuously. The main construction task is drilling holes in the NFT channels at appropriate spacing for your net cups and ensuring the channels are tilted at the correct angle — roughly one to two percent grade — for the nutrient film to flow properly without pooling.
The cost comparison between DIY and all-in-one is significant. A DIY Kratky setup for six plants costs under fifteen dollars in materials. A DIY DWC bucket for four to six plants costs twenty to thirty dollars. A DIY NFT system for twelve to twenty-four plants can be built for forty to eighty dollars depending on component quality. Compare those figures to the AeroGarden Bounty at around one hundred fifty to two hundred dollars, the Click and Grow Smart Garden 9 at around two hundred dollars, or the Lettuce Grow Farmstand starting at five hundred dollars plus grow light. DIY is dramatically cheaper — the trade-off is time and the learning curve of building and troubleshooting your own system rather than following a product's guided experience.
Hydroponic Nutrients — Feeding Your Plants Without Soil
Nutrients are the most intellectually interesting and most practically critical variable in hydroponic growing, and getting them right is what separates systems where plants thrive from systems where they struggle despite adequate light and well-functioning equipment. In soil growing, a complex ecosystem of microorganisms, organic matter decomposition, and soil chemistry manages nutrient availability — you add fertilizer occasionally and the soil does the detailed work. In hydroponics, you are the soil. You are responsible for providing every element your plants need, in the right ratios, at the right concentrations, at the right pH for those nutrients to be available to roots.
Understanding NPK in the hydroponic context starts with the basics — nitrogen (N) supports leaf and stem growth, phosphorus (P) supports root development and flowering and fruiting, potassium (K) supports overall plant health and fruit quality — and extends to the full range of macro and micronutrients that plants need. Calcium, magnesium, sulfur, iron, manganese, zinc, copper, boron, and molybdenum are all required in smaller quantities but are genuinely essential — plants show clear deficiency symptoms when any of them is inadequate, and deficiencies that would be gradually corrected by soil chemistry in a soil system can develop quickly in hydroponics where there's no soil buffering.
For beginners, I strongly recommend starting with a complete, purpose-formulated hydroponic nutrient solution rather than trying to build a nutrient mix from individual components. General Hydroponics Flora Series is the most widely used nutrient line in hobby hydroponics and for good reason — the three-part Flora Gro, Flora Micro, and Flora Bloom system provides complete nutrition for any plant at any growth stage, with mixing ratios published for different crops and growth stages. It's used in commercial hydroponic operations and by hobby growers at every level, the company provides excellent support documentation, and it works. The alternative that's gained significant popularity in recent years is Masterblend, a two-part system (Masterblend 4-18-38 plus calcium nitrate plus Epsom salt) originally formulated for commercial tomato production that provides outstanding results at lower cost per gallon mixed than the Flora Series. Both are excellent choices — Flora Series is more beginner-friendly with better documentation, Masterblend is more economical for larger setups.
pH management is the most important ongoing maintenance task in any hydroponic system, and it's where many beginners encounter their first real challenge. pH — the measure of acidity or alkalinity — affects nutrient availability by controlling which ionic forms nutrients take in solution and whether plant roots can absorb them. The ideal pH range for most hydroponic crops is 5.5 to 6.5, with most nutrients having maximum availability around 5.8 to 6.2. Outside this range — even with perfectly formulated nutrients — plants can't absorb key nutrients and show deficiency symptoms despite those nutrients being present in the solution. Checking pH daily with a digital pH meter — not test strips, which are too imprecise for hydroponic work — and adjusting with pH Up (potassium hydroxide solution) or pH Down (phosphoric acid solution) when readings drift outside the target range is the core of hydroponic water management.
EC — Electrical Conductivity — and TDS — Total Dissolved Solids — are measures of nutrient concentration in your solution. EC is measured in milliSiemens per centimeter (mS/cm) and TDS in parts per million (ppm), and they're directly related — most TDS meters simply convert EC to ppm using a fixed multiplication factor. For leafy greens and herbs, a target EC of 1.2 to 2.0 mS/cm (approximately 600 to 1000 ppm) is appropriate. For fruiting plants, a higher EC of 2.0 to 3.5 mS/cm supports more intensive nutrient demands. A combined pH and EC/TDS meter — available from brands like Apera, BlueLab, and various budget options on Amazon — is an essential tool that you'll use every time you check your system.
Lighting for Hydroponic Apartment Gardens
Light in a hydroponic system is even more critical than in soil growing, and the reason connects directly to why hydroponics is so productive — because nutrients are optimally available and root health is well-managed, the main limiting factor on plant growth rate and productivity is often light. A hydroponic plant with perfect nutrition but insufficient light is like an engine with premium fuel but a throttle that won't open. The nutrition is there but the energy system to use it is constrained.
The light requirements for hydroponic crops are essentially the same as for the same crops grown in soil — leafy greens and herbs need roughly 200 to 400 μmol/m²/s PPFD, fruiting plants need 400 to 800 or more. What changes in a hydroponic context is the consequence of inadequate light. In soil, a plant with insufficient light grows slowly, looks pale, and underproduces — bad enough. In a high-performing hydroponic system where everything else is dialed in, insufficient light becomes the single bottleneck that prevents the system from delivering on its potential. The investment in a quality grow light pays dividends in a hydroponic setup that it doesn't always deliver in a mediocre soil setup, because the rest of the system is capable of more if the light allows it.
For all-in-one systems, the integrated grow lights are purpose-matched to the system's growing capacity and are generally adequate for the crops those systems are designed for. The AeroGarden's LED arrays produce sufficient light for herbs and lettuce at their rated capacity. The Lettuce Grow Farmstand's add-on Glow Rings are well-matched to the tower's growing capacity. In these systems, light is essentially managed for you. For DIY systems, light selection is your responsibility and the same guidance from the previous article applies — Spider Farmer and Mars Hydro bar lights for herb and greens setups, panels for fruiting plant systems, with hanging height and PPFD matching appropriate for the crop.
One consideration specific to hydroponic setups is light and algae management. Any light that reaches your nutrient solution will eventually cause algae growth — algae thrive in nutrient-rich water with light exposure. This is why hydroponic reservoirs should always be opaque or covered, net pots should fit tightly in their holes to minimize solution exposure, and any transparent components in your system should be covered or painted. In a Kratky mason jar system this means covering the jar. In a DWC bucket this means using a dark bucket and opaque lid. Managing light exclusion from your nutrient solution is not optional — it's the difference between a clean system and a green, algae-filled one.
Light schedules for hydroponic crops follow the same photoperiod principles as soil growing but the consistency of those schedules matters even more in a system where everything else is optimized. Running a timer on your grow lights — set for sixteen hours for leafy greens and herbs, eighteen hours for fruiting plants in their vegetative phase — provides the predictable light cycle that supports consistent growth. Resist the temptation to run lights longer thinking it will accelerate growth further — most plants need a genuine dark period for certain physiological processes, and continuous light stress is a real phenomenon that shows up as slower growth and physiological abnormalities in affected plants.
The Best Plants to Grow Hydroponically in an Apartment
Hydroponics works for a wide range of plants, but some are dramatically better suited to apartment-scale hydroponic growing than others — either because they grow quickly and provide rapid feedback for learning, because their light and space requirements are manageable in a typical apartment, or because the hydroponic growth advantage is particularly pronounced for that crop type.
Lettuce is the perfect beginner hydroponic crop and the first thing I recommend everyone grow, without exception. The reasons stack up compellingly: lettuce grows extraordinarily fast in hydroponics — full-size heads in thirty to forty-five days, baby leaves harvestable in as little as two weeks. It has modest light requirements, well within what even basic grow lights provide. It thrives in the pH range that's easy to maintain. It doesn't require pollination. It responds visually and immediately to changes in the system — both good changes (better nutrients, more light, optimal pH) and problems (deficiencies, pH drift) — which makes it an excellent learning plant that gives you rapid, clear feedback. Loose-leaf varieties like 'Black Seeded Simpson', 'Oakleaf', and 'Red Sails' are particularly well-suited to continuous cut-and-come-again harvesting that keeps a hydroponic system productive for extended periods.
Herbs are the second category I'd recommend to any apartment hydroponic beginner, specifically for the practical value they provide relative to growing effort. Basil in a Kratky jar or DWC system grows with an exuberance that soil-grown basil rarely matches — the growth rate is noticeably faster, the plants get larger and more productive, and the flavor is at least as good. In my own experience, hydroponic basil has consistently outperformed soil-grown basil in yield by a significant margin, and the elimination of soil moisture management has removed the inconsistency that stressed my soil basil and reduced its productivity. Mint, chives, parsley, and cilantro all do well hydroponically with similar benefits. The one herb I'd approach with more care is rosemary — it grows slowly regardless of growing method and prefers slightly drier conditions than most hydroponic systems naturally provide.
Cherry tomatoes represent the next level of hydroponic ambition and are achievable for apartment growers who've had success with greens and herbs and want to try fruiting crops. They require more light than leafy crops — ideally a dedicated panel light rather than a bar light — and they need hand pollination indoors since there are no bees to do the work. They also need taller growing spaces as they mature, and the support structure for vining varieties requires some planning. But the reward — cherry tomatoes continuously ripening on a plant growing in a jar or bucket of nutrient solution in your apartment — is genuinely extraordinary, and the flavor of hydroponically grown cherry tomatoes is remarkably good. 'Tumbling Tom', 'Tiny Tim', and 'Patio' varieties are the most manageable for apartment hydroponic growing. Peppers follow similar principles and are slightly more compact — dwarf varieties like 'Chenzo' or standard sweet peppers in a DWC bucket produce well in apartment hydroponic setups.
Microgreens in hydroponic systems occupy a slightly different space than other hydroponic crops — they're typically grown in shallow trays on a moistened growing medium (often a hydroponic-specific medium like hemp mats or rockwool sheets) rather than in a recirculating nutrient system. The growing medium is bottom-watered with diluted nutrient solution once or twice during the brief growing period. This isn't hydroponics in the purest sense but it's close enough to fall within the hydroponic umbrella, and the results are excellent. Hydroponic microgreens grow slightly faster and more uniformly than soil-grown microgreens in many cases, and the absence of soil eliminates any soil contamination risk in the harvest.
Plants to avoid as a beginner apartment hydroponic grower: large vining crops like cucumbers, squash, and melons require enormous growing space, high light intensity, and active management of their vigorous growth that makes them inappropriate for apartment-scale growing. Root vegetables — carrots, beets, radishes — can technically be grown hydroponically but require specific system types and management approaches that are beyond beginner scope. Large fruiting plants like full-size tomatoes and bell peppers are achievable but require serious light investment and significant vertical space. Start with lettuce and herbs, build your skills and confidence, and expand to more demanding crops once you understand your system's behavior and your apartment's specific conditions.
Water, pH, and Nutrient Management — The Ongoing Routine
The ongoing maintenance routine for a hydroponic system is lighter than most beginners expect — certainly lighter than the daily attention that soil containers in dry apartment air often require — but it does require consistency and attention to the few variables that matter. Missing a day or two of maintenance is usually fine. Missing a week while your pH drifts and your nutrient concentration swings can cause real plant stress that takes time to recover from.
Setting up your reservoir correctly at the beginning of each reservoir cycle establishes the baseline from which all subsequent maintenance is measured. Start with clean, room-temperature water — if your tap water is heavily chlorinated, let it sit for a few hours before mixing nutrients, or use filtered water. Add nutrients to the target EC for your crop — starting at the lower end of the recommended range for seedlings and young plants and increasing as they mature. Then check and adjust pH to your target range of 5.8 to 6.2. Mix thoroughly and confirm your readings are stable before introducing plants. This initial setup ritual is the most important single maintenance task in your hydroponic cycle — getting it right means a stable starting point from which the ongoing adjustments are minor.
Daily maintenance takes five minutes at most and consists of checking water level, checking pH, and visually inspecting plants. Water level drops as plants absorb solution and as evaporation occurs. Top up with plain, pH-adjusted water rather than fresh nutrient solution — adding nutrient solution to top up would continuously increase nutrient concentration as water is consumed without replenishing nutrients at the same rate. Check pH daily because it drifts — plant roots release compounds that affect solution pH, nutrient interactions change pH, and even the microbial communities in a reservoir affect pH over time. Adjusting small pH drifts daily is far easier than correcting a large drift that's been accumulating for a week.
Weekly maintenance involves checking EC/TDS — nutrient concentration — and making decisions about partial or full reservoir changes. Nutrient concentration changes over time as plants selectively absorb different nutrients at different rates — some nutrients deplete faster than others, causing the remaining solution's concentration and ratio to drift from the ideal. Checking EC weekly tells you whether concentration has increased (more evaporation than nutrient uptake — top up with plain water), decreased (more nutrient uptake than evaporation — add small amounts of nutrient solution), or drifted to a ratio that needs a full reservoir change. Most home hydroponic growers do a full reservoir change every two to three weeks — emptying the reservoir completely, rinsing it, and refilling with freshly mixed nutrient solution. This full reset prevents the nutrient ratio drift and microbial accumulation that cause problems in systems that never get a complete refresh.
Preventing nutrient deficiencies is easier than treating them, and the preventive strategy is simply consistent, attentive nutrient and pH management. The most common deficiencies in apartment hydroponic systems are calcium and magnesium — often showing up as interveinal yellowing, leaf curl, or brown spots on leaves — which result from pH drift into ranges where these nutrients are less available, from using nutrient solutions that are incomplete in these elements, or from growing in soft water that lacks naturally occurring calcium and magnesium. Adding a CalMag supplement to your nutrient solution — particularly if you're in a soft water area — prevents most calcium and magnesium deficiency issues before they start.
Troubleshooting Common Hydroponic Problems
Every hydroponic grower deals with problems — the system is simpler than soil in many ways but more immediately responsive to management errors, which means issues that develop slowly in soil can appear quickly in hydroponics. Knowing what to look for and how to respond keeps small problems from becoming plant-ending crises.
Algae growth is the most common problem in home hydroponic systems and one of the easiest to prevent but most annoying to deal with once established. Algae are photosynthetic organisms that grow prolifically in nutrient-rich water when exposed to light — precisely the conditions in an inadequately covered hydroponic reservoir. Prevention is straightforward: use opaque containers for all reservoirs and nutrient solution storage, cover any openings where light might penetrate to the solution, and use dark-colored net cups and growing medium. If algae has already established, it looks like green, brown, or sometimes reddish coating on reservoir walls, net cup surfaces, and roots. Treatment involves a full system cleanout — emptying and scrubbing the reservoir with diluted hydrogen peroxide solution, rinsing all components thoroughly, replacing the nutrient solution with fresh mix, and improving light exclusion to prevent recurrence. Algae itself won't immediately kill plants but it competes for nutrients and oxygen, fouls pump components, and can harbor pathogens that cause root problems.
Root rot is the hydroponic problem that causes beginners the most distress because its primary symptom — brown, slimy, foul-smelling roots — looks alarmingly bad and progresses quickly if not addressed. Healthy hydroponic roots are white to pale tan, firm, and smell clean or slightly earthy. Rotted roots are brown or black, slimy, and have a distinct unpleasant odor. Root rot in hydroponics is caused by Pythium and related water mold pathogens that thrive in warm, oxygen-poor, poorly maintained nutrient solution. Prevention focuses on maintaining adequate dissolved oxygen through air pump operation, keeping nutrient solution temperature below 72°F (cooler solution holds more dissolved oxygen and is less hospitable to Pythium), maintaining clean reservoirs with regular changes, and avoiding light exposure to roots. Treatment involves removing affected root material, cleaning the reservoir thoroughly, adding beneficial bacteria products like Hydroguard (Bacillus amyloliquefaciens) or similar to the fresh nutrient solution, and ensuring the air pump is providing adequate oxygenation.
Nutrient burn appears as brown leaf tips and edges — the same visual symptom as salt buildup burn in soil plants but with a more specific cause in hydroponics: EC/TDS too high. When nutrient concentration exceeds the plant's ability to absorb and process it, the excess minerals accumulate in leaf tissue and cause burn, starting at the most metabolically active edges. The fix is to dilute the nutrient solution — either by adding plain pH-adjusted water to the reservoir to reduce concentration, or by doing a partial reservoir change with fresh solution mixed at a lower concentration. Going forward, check EC more regularly and resist the temptation to feed at the high end of recommended ranges, especially for young plants that are more sensitive to nutrient concentration than mature ones.
pH fluctuations — rapid swings in pH despite regular adjustment — indicate something in the system is destabilizing the solution's chemistry. Large plant root systems release significant amounts of compounds that affect pH. High biological activity in the reservoir from beneficial or problematic microorganisms affects pH. Running out of pH buffer capacity in the solution — particularly in soft water — causes rapid pH swings. The solution to persistent pH instability is a combination of more frequent adjustment to catch swings before they become large, increasing reservoir size relative to plant load to provide more chemical buffering volume, and ensuring regular complete reservoir changes prevent accumulation of pH-affecting compounds. Some growers add small amounts of phosphoric buffer to their solution to improve pH stability — this can help in systems that persistently struggle to hold pH.
Pump failure is worth planning for in any active hydroponic system — not because it's common, but because the consequences of a pump stopping in a DWC or NFT system can be significant if not caught quickly. In a DWC system, pump failure means roots lose dissolved oxygen, which can cause root stress in hours and begin root rot within a day or two. In an NFT system, pump failure means roots dry out — they have no reservoir to draw from — which can cause wilting within hours and plant death within a day in warm conditions. The practical preparation is knowing your system's tolerance — Kratky systems are immune to pump failure by design, DWC systems have several hours of tolerance before problems develop, NFT systems are the most sensitive. A spare air pump for your DWC system costs ten dollars and provides genuine peace of mind. And checking your system daily — even just a thirty-second visual check — means pump failures are caught quickly rather than discovered after serious damage has occurred.
Conclusion
Hydroponic gardening in an apartment is one of those things that sounds more technically demanding than it actually is, and the gap between the intimidating terminology and the accessible reality becomes clear the moment you set up your first Kratky jar and watch lettuce germinate in it within days and reach harvest size in weeks. The principles are simple — water, nutrients, light, oxygen — and the range of systems available means there's an entry point for every budget, every space, and every level of desired involvement.
Start simple. A Kratky mason jar with some lettuce seeds and a basic nutrient solution costs fifteen dollars and teaches you more about hydroponic growing in six weeks than any amount of reading. If you want to skip the DIY entirely, an AeroGarden Harvest or iDOO twelve-pod system gets you growing immediately with minimal setup and good results for herbs and greens. Build your understanding of pH management, nutrient concentration, and how your apartment's specific light and temperature conditions affect your plants. Then expand — to more capacity, to more demanding crops, to DIY systems if the all-in-one feels limiting — as your knowledge and confidence grow.
Drop your hydroponic setup details, your first harvest photos, your troubleshooting questions, or your system recommendations in the comments below. Apartment hydroponic growing is a genuinely exciting corner of urban gardening with a community of experienced growers who love talking about their systems — your question has almost certainly been answered somewhere in that community, and your experience adds something useful for the next beginner who's exactly where you were when you started reading this. Now go find a mason jar and some lettuce seeds. 💧