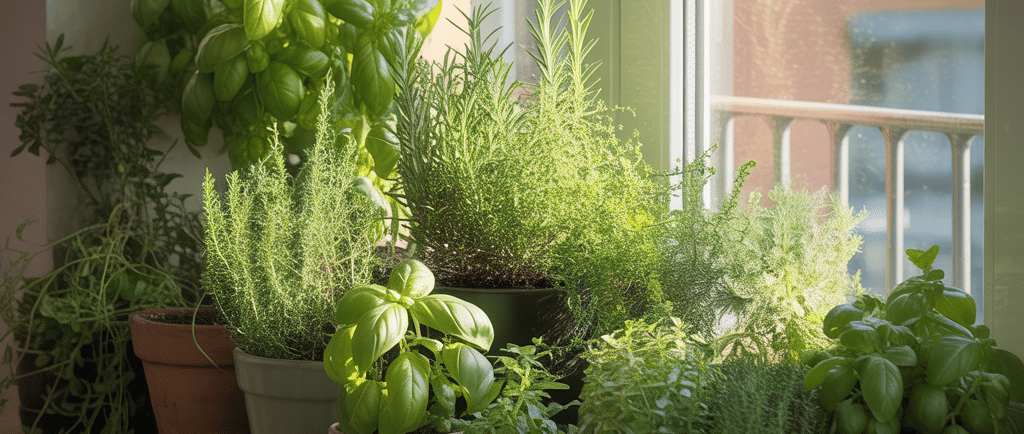
10 Container Gardening Mistakes That Kill Your Plants (And How to Fix Them)
Stop killing your container plants! Learn the 10 most common container gardening mistakes that cause plant death, plus proven solutions to fix them and keep your plants thriving.
CONTAINER TINY PLOTS: CROPS, SOIL & CLEVER HACKS
Introduction
I still remember the beautiful container garden I set up my first spring as a homeowner with a tiny balcony. I spent $300+ on gorgeous ceramic pots, premium plants from the nursery, and bags of what I thought was the right soil. I arranged everything beautifully, watered religiously, and felt so proud of myself. Within six weeks, half the plants were dead. Within three months, I had maybe three struggling survivors out of the twenty plants I'd started with.
I was devastated and completely confused. I'd followed the basic instructions—water regularly, put them in sun, use good soil. What had gone wrong? Everything, it turns out. I'd made at least seven of the ten mistakes I'm about to share with you. My "good soil" was actually garden soil that had compacted into cement. My watering schedule was drowning some plants and dehydrating others. My container choices were wrong. My plant selections were terrible for my conditions.
The frustrating part? Every single mistake was preventable. I just didn't know what I didn't know. And here's the thing—I'm not alone. Studies show that container gardens have a significantly higher failure rate than in-ground gardens, with some estimates suggesting 40-50% of container plants die in their first season. That's not because container gardening is inherently difficult—it's because the mistakes that kill plants happen faster and more severely in containers than in the ground.
Here's what motivated me to write this: after that first disastrous year, I spent five years learning through trial, error, research, and advice from experienced gardeners. I've now successfully maintained container gardens through dozens of seasons. I've grown vegetables, flowers, herbs, and houseplants in hundreds of containers. I've made every mistake on this list at least once, and I've learned how to fix them all.
In this guide, I'm sharing the ten most common container gardening mistakes that kill plants, why they happen, how to recognize them, and most importantly—how to fix them. These aren't obscure technical problems. These are the everyday mistakes that beginners (and sometimes experienced gardeners) make constantly. The good news? Once you know what to look for, they're all completely preventable and mostly fixable. Let's dive in and save your plants!
Why Container Gardening Fails More Often Than Ground Gardening
Before we get into specific mistakes, let's understand why containers are more challenging than they appear.
Limited soil volume magnifies every mistake you make. In the ground, plants have access to massive volumes of soil—cubic yards or more. A container has maybe 1-7 gallons typically. This tiny volume means: nutrients deplete rapidly, moisture fluctuates wildly, temperature changes affect roots directly, and there's no buffer against mistakes. In the ground, you can skip watering for a few days and plants tap into deeper moisture. In containers, missing one watering in hot weather can kill plants.
No buffer from the earth's ecosystem means containers are isolated systems. In-ground plants benefit from: soil microorganisms that recycle nutrients, earthworms that aerate soil, natural moisture regulation from capillary action with groundwater, and temperature moderation from the earth's thermal mass. Container plants have only what you provide. The isolation means you're completely responsible for everything the plant needs—there's no natural safety net.
Faster drying and nutrient depletion happen because every watering leaches nutrients out the drainage holes and soil volume is small. I've measured this: a 5-gallon container in full sun can go from saturated to bone dry in 24 hours in summer. The frequent watering needed to compensate washes nutrients away rapidly. In the ground, nutrients move through soil slowly and plants have time to absorb them. In containers, they're gone in weeks without fertilizing.
More extreme temperature fluctuations stress plants in ways ground planting doesn't. I've measured 20-30°F temperature differences between container soil and ground soil in the same location. Small dark containers in sun can heat to 100°F+ while ground soil stays at 75°F. In winter, containers freeze solid while ground soil stays above freezing. These extreme swings stress and damage roots. Plants in containers experience environmental extremes that ground-planted plants never see.
Complete dependence on the gardener is the fundamental challenge. In the ground, nature provides rain, ground moisture reserves, nutrient cycling, and temperature moderation. Containers get only what you provide—nothing more. There's no rainfall backup (it evaporates too fast from small containers), no natural fertility, no moisture reserves. This complete dependence means consistent care is mandatory. In the ground, you can slack off and plants might be fine. In containers, neglect kills quickly.
Drainage issues are hidden until it's too late because you can't see what's happening at the bottom of the container. Water might be pooling at the bottom while the surface looks fine. Roots might be rotting in saturated soil while you're wondering why the plant is wilting. In the ground, drainage problems often show surface symptoms earlier. In containers, by the time you realize there's a drainage problem, significant root damage has occurred.
Container choice affects everything—material, size, shape, color all matter. Terracotta dries faster than plastic. Black pots heat more than white pots. Small pots dry out faster than large pots. Shallow pots don't fit deep roots. The container itself is a variable that doesn't exist in ground gardening. I've killed plants purely through bad container choices—wrong size, wrong material, wrong drainage. The container is as important as the plant.
Why beginners struggle despite good intentions: container gardening looks simple (put plant in pot, water it, done) but has hidden complexity. The mistakes that kill plants aren't obvious until you've made them. Instructions from nurseries are overly simplified. The learning curve is steeper than expected. Most people (including me initially) assume container gardening is easier than ground gardening. It's actually more demanding in many ways. Understanding this prevents discouragement when things go wrong.
Mistake #1: Using Garden Soil in Containers (The Silent Killer)
This is probably the single most common mistake I see, and it kills plants slowly and insidiously.
Why garden soil compacts and suffocates roots: garden soil is designed to work as part of a massive ecosystem with natural aeration from worms, roots, and freeze-thaw cycles. In a container, it compacts under its own weight within weeks. The small particles pack together tightly, eliminating air pockets. Roots need oxygen—compacted soil has no air. I've unpotted plants in garden soil and found the soil literally hard as concrete with roots struggling at the edges. The compaction suffocates roots slowly over months.
The drainage disaster that develops slowly is worse than immediate failure. Initially, garden soil in containers seems fine. But as it compacts, it drains slower and slower. Water starts pooling on the surface. The bottom stays saturated for days. By the time drainage has failed completely, the plant has been struggling for weeks and root damage is severe. I've seen this cycle repeatedly: plant looks great for 3-4 weeks, then slowly declines over the next 2 months as soil compaction worsens.
Weight problems from heavy garden soil matter if you're on a balcony or moving containers. Garden soil weighs 75-100 pounds per cubic foot when wet. Potting mix weighs 40-50 pounds per cubic foot. A 10-gallon container filled with garden soil can weigh 80-100 pounds versus 40-50 pounds with potting mix. This isn't just inconvenience—it's a safety issue on balconies with weight limits. I've had to replace garden soil with potting mix purely due to weight concerns.
Disease and pest transfer from ground to containers brings problems you didn't have before. Garden soil contains fungal spores, bacteria, weed seeds, insect eggs, and various pathogens. Some of these are fine in the ground (balanced by ecosystem) but problematic in isolated containers. I've introduced fungus gnats, soil-borne diseases, and persistent weeds by using garden soil. Sterile potting mix avoids these problems entirely. The risk isn't worth the money saved.
What actually happens to roots in compacted soil: they can't penetrate the dense soil, so they circle the inside edges of the container looking for easier growing. They can't access water efficiently because compacted soil becomes hydrophobic (repels water). They can't get oxygen because air spaces are eliminated. The roots essentially suffocate while the plant slowly declines. I've unpotted failing plants and found all roots in the outer 1 inch of soil with the center being a compacted lifeless mass.
The right potting mix and why it matters: quality potting mix contains peat or coir (moisture retention), perlite or vermiculite (drainage and aeration), and small amounts of compost or nutrients (initial fertility). This combination maintains structure over time—it doesn't compact. It drains excess water while retaining appropriate moisture. It has air pockets for root oxygen. Plants in quality potting mix consistently outperform plants in garden soil in my experience—by huge margins.
How to fix containers with garden soil: if you've already planted in garden soil and plants are struggling, you need to repot. Carefully remove the plant, discard the garden soil, wash the container, fill with proper potting mix, and replant. This is stressful for the plant but less stressful than slowly dying in compacted soil. I've saved numerous plants this way. The recovery is usually rapid—within 2-3 weeks, plants show new growth and improved vigor.
Real cost comparison between soil and potting mix: garden soil appears free (if you have access) but costs in plant deaths and reduced growth. A bag of quality potting mix costs $8-15 for 2 cubic feet (roughly 15 gallons). That's enough for 2-3 large containers. If using cheap garden soil kills even one $15 plant, you've lost more than potting mix costs. The math strongly favors buying proper potting mix. The "free" garden soil ends up being very expensive.
Mistake #2: Wrong Container Size (Too Small or Too Large)
I've killed more plants through wrong container sizing than any other mistake except poor drainage.
How undersized containers stunt growth permanently happens because roots hit the container walls and have nowhere to go. They circle endlessly, becoming root-bound. A root-bound plant can't absorb water efficiently (water runs straight through), can't access adequate nutrients (limited soil volume), and can't support the above-ground growth you want. I had a tomato plant in a 3-gallon container that grew to 18 inches and stopped—completely stunted. The same variety in a 7-gallon container grew to 5 feet and produced 10x the fruit.
The overwatering trap of oversized containers happens when small plants are put in huge containers. The plant's roots occupy maybe 10% of the soil volume. The other 90% stays wet because there are no roots to absorb water. This wet unused soil becomes anaerobic (no oxygen) and promotes root rot. I've killed seedlings by planting them in 10-gallon containers—the roots rotted in the constantly wet soil they couldn't access. Bigger is not always better.
Root-bound symptoms you're missing include: roots visibly circling at the soil surface, roots growing out of drainage holes in abundance, water running straight through without soaking in, needing to water twice daily despite good watering previously, and stunted growth despite adequate light and care. I see these symptoms in my own containers and realize I've waited too long to pot up. Early detection allows correction before permanent damage.
Why "room to grow" logic backfires: it seems reasonable to give plants a large container so they have "room to grow." But young plants can't utilize large soil volumes. Their roots haven't penetrated deeply yet. The unused soil stays wet. Better to start appropriately small and pot up as the plant grows—this allows roots to fully colonize each container before moving to a larger one. Progressive potting produces healthier root systems than jumping straight to large containers.
Matching container size to plant type is essential. Shallow-rooted plants (lettuce, herbs, many flowers) do well in 6-10 inch deep containers. Deep-rooted plants (tomatoes, carrots, many perennials) need 12-18+ inches. Small plants need small containers (4-6 inches). Large plants need large containers (12-18+ inches). The specific requirements vary by plant. I keep a mental chart of minimums: tomatoes 5+ gallons, peppers 3-5 gallons, herbs 6-8 inches, lettuce 6-8 inches, etc.
The 2-inch rule for repotting explained: when potting up, move to a container 2 inches larger in diameter than the current container. A plant in a 6-inch pot goes to an 8-inch pot, not a 12-inch pot. This gradual sizing allows roots to fill each container before moving up. I follow this rule religiously for houseplants and have dramatically better results than when I jumped sizes. The 2-inch rule prevents both undersizing and oversizing.
When to size up versus when to wait: size up when roots are growing out of drainage holes, when the plant is clearly root-bound, or when you're watering daily and it's still not enough. Wait if the plant is thriving, if you can only see a few roots at drainage holes, or if the current container still has visible soil when you gently lift the plant. I err on the side of waiting slightly too long rather than sizing up too early—slight pot-bound is less harmful than oversized containers.
My container sizing failures and lessons learned: I've undersized tomatoes (got 5 tomatoes instead of 50), oversized seedlings (killed them with root rot), and used wrong container shapes (deep pots for shallow-rooted plants). Each failure taught me the importance of matching container size to plant needs. Now I research before potting and rarely make sizing errors. The difference in plant performance is dramatic when sizing is correct.
Mistake #3: Inadequate Drainage (Death by Drowning)
More plants die from overwatering and poor drainage than from any other single cause. This mistake is completely preventable.
No drainage holes equals certain death for most plants (exceptions: aquatic plants, some tropical aroids). Without drainage, excess water has nowhere to go. It accumulates at the bottom, the soil becomes saturated, roots rot, and the plant dies. I've seen people plant in decorative pots with no holes thinking "I'll just be careful not to overwater." It never works. Eventually you misjudge, the container floods, and the plant dies. Drainage holes are non-negotiable.
Too few or too small drainage holes create the same problems as no holes, just slower. One tiny hole in the center of a 12-inch pot is inadequate. Water drains so slowly that soil stays saturated for days. I've had containers with inadequate drainage where the top inch would be dry (so I'd water) while the bottom was still soggy. This creates confusing symptoms—the plant looks underwatered but is actually overwatered. Multiple large holes are essential.
Blocked drainage from roots or debris is sneaky because drainage starts fine but fails over time. Roots grow into and block drainage holes. Soil particles wash down and clog holes. Debris from potting mix accumulates and creates barriers. I've had containers that drained perfectly for months, then suddenly stopped draining and plants suffered. Now I periodically check that drainage holes are clear by poking through from the bottom with a stick.
The "rocks in the bottom" myth actually makes drainage worse, not better. People put rocks in the bottom thinking it "improves drainage." Actually, rocks create a perched water table—water sits in the soil above the rocks rather than draining. This keeps the lower soil saturated. I tested this directly: containers with rocks in the bottom had wetter lower soil than containers without rocks. The myth persists but it's completely wrong. Skip the rocks.
Saucers that create standing water problems are necessary to catch drainage but dangerous if water sits in them. If saucers stay full of water, containers essentially sit in water and the soil wicks it back up, staying saturated. I killed plants this way before learning to empty saucers after watering. Now I either pour off excess water from saucers 30 minutes after watering, or I raise containers on pot feet so they don't sit directly in saucer water.
Testing drainage before it's too late is simple: water thoroughly and watch how fast it drains. Water should start draining from holes within 30-60 seconds and should drain fully within a few minutes. If water sits on the surface or takes 10+ minutes to drain, drainage is inadequate. I test new containers before planting. If drainage is slow, I drill more/larger holes before adding soil and plants. Prevention is way easier than fixing drainage problems after planting.
Drilling drainage holes in containers without them is possible in most materials. Ceramic, plastic, resin, and even some wood containers can have holes drilled. I use a drill with appropriate bit (masonry bit for ceramic, regular bit for plastic/wood). Drill from inside to avoid cracking. Start with 3-5 holes of 1/2 inch diameter for a 12-inch container. I've retrofitted dozens of decorative pots this way. Adds drainage to otherwise beautiful but non-functional containers.
Fixing drainage problems in planted containers is more challenging but possible. If drainage has failed and the plant is suffering, you may need to unpot, add more drainage holes, and repot with fresh soil. Or you can repot into a new container with proper drainage. If the plant is severely damaged from waterlogging, you might need to trim damaged roots before repotting. I've saved root-rotted plants through emergency repotting, but survival isn't guaranteed. Prevention is far better.
Mistake #4: Inconsistent Watering (Feast or Famine)
This is my personal demon—I still struggle with watering consistency despite years of experience.
The wet-dry stress cycle weakens plants even if they survive. Each time soil dries completely, roots are stressed. Each time it floods from overcompensating, roots are stressed. This cycling between extremes prevents the plant from reaching its potential. I've compared plants watered consistently with plants on wet-dry cycles—the difference is significant. Consistent plants grow faster, produce more, resist pests better, and just look healthier overall.
Overwatering versus underwatering symptoms overlap confusingly. Both cause wilting. Both can cause yellowing leaves. Both stress plants. The difference: overwatering creates persistently wet soil and often mushy stems/roots. Underwatering creates dry soil and crispy leaf edges. But the symptoms can look identical topside. The only reliable way to distinguish is checking soil moisture. I've "rescued" wilting plants by watering only to discover the soil was already soggy—the wilting was from overwatering and I made it worse.
Why "watering schedules" don't work: plants don't use water on a schedule. Water needs vary by temperature, sun exposure, humidity, plant size, and growth stage. Watering "every Monday and Thursday" guarantees you'll overwater sometimes (cool cloudy weeks) and underwater other times (hot sunny weeks). Schedules create the very inconsistency they're meant to prevent. I used schedules initially and killed plants. Now I check moisture and water as needed.
The finger test you should be using: stick your finger 2 inches into the soil. If it feels dry at that depth, water. If it feels moist, wait. This simple test tells you what the plant actually needs rather than what a schedule dictates. I use this test daily in summer, every 2-3 days in spring/fall. It takes 5 seconds per container and prevents both over and underwatering. This single habit has saved me from more watering mistakes than anything else.
Blossom end rot from inconsistent watering is a specific problem in tomatoes and peppers that's entirely preventable. Blossom end rot (that black sunken spot on the bottom of fruit) isn't a disease—it's calcium deficiency caused by inconsistent water delivery. When watering is erratic, calcium uptake is erratic, and blossom end rot develops. I've had entire crops affected by this. The fix: consistent watering. Literally just water consistently and it doesn't happen.
Wilting that looks like underwatering but isn't can be root rot from overwatering. The plant wilts because damaged roots can't absorb water even though soil is wet. This confuses people (me included initially) into watering more, which makes it worse. The diagnostic: check soil moisture before watering wilted plants. If soil is wet, do NOT water—the problem is root damage, not thirst. I've learned to always check soil before reacting to wilting.
Creating consistent watering routines involves checking moisture regularly (daily in summer) and watering based on actual need rather than schedule. I check all containers every morning, use the finger test on any that look or feel dry, and water those that need it. This responsive approach maintains consistency without rigid scheduling. The routine is "check daily and respond" rather than "water every X days."
Solutions for forgetful or busy gardeners include: self-watering planters (reservoir maintains consistency), drip irrigation on timers (automated watering), grouping plants by water needs (check/water them together), setting phone reminders to check plants, or simply growing fewer plants so daily checking is manageable. I use a mix: self-watering for high-value plants, daily morning check for everything else. The system works because it matches my lifestyle rather than fighting it.
Mistake #5: Ignoring Light Requirements (Wrong Plant, Wrong Place)
This mistake is often invisible to beginners who don't realize how drastically light affects plant success.
Full sun plants dying in shade show specific symptoms: leggy stretched growth (reaching for light), pale or yellowing leaves, failure to flower, weak stems that flop over, and slow growth. I tried growing tomatoes in 4 hours of morning sun—they grew to 3 feet tall, never flowered, never fruited, and eventually died. Same variety in 8 hours of sun produced prolifically. The light difference was the only variable. Full sun plants need 6-8+ hours of direct sun—less than that and they fail.
Shade plants burning in full sun show equally clear symptoms: scorched brown leaf edges, bleached or faded color, wilting despite adequate water, and crispy dried leaves. I put ferns in full afternoon sun and they crisped within days. Shade plants evolved under forest canopies—direct sun literally burns them. The damage is often permanent on affected leaves. Moving to proper shade allows new growth to develop healthy, but burned leaves don't recover.
The "6 hours of sun" rule explained: "full sun" means 6-8+ hours of direct sun daily. "Partial sun/partial shade" means 4-6 hours. "Shade" means less than 4 hours or filtered light all day. These aren't arbitrary categories—they represent real physiological differences in how plants process light. A full sun plant getting 4 hours can't perform photosynthesis adequately to support growth and fruiting. A shade plant getting 8 hours gets more light than it's adapted for and suffers stress.
Assessing actual light in your space requires tracking sun over a full day, not guessing. I've learned the hard way that my assessment is usually wrong until I actually measure. I now spend a sunny day checking specific spots every hour and noting sun/shade. Morning sun is different from afternoon sun (less intense). Dappled shade under trees is different from solid shade from buildings. Measuring actual conditions prevents mismatches.
Leggy stretched growth from insufficient light is the plant literally reaching for more light. Stems elongate abnormally, leaves are spaced far apart on stems, the plant becomes weak and floppy, and it looks nothing like healthy specimens of the same variety. I've grown basil in low light that stretched to 3 feet with sparse tiny leaves—useless for harvesting. Same basil in adequate light stayed compact at 18 inches with large abundant leaves. Light dramatically affects plant form.
Leaf scorch from too much sun appears as brown crispy edges and tips, bleached-out color, or whole leaves turning brown and dying. I've scorched many plants by moving them from shade to full sun without acclimating. Even full-sun plants can scorch if moved abruptly to more intense light than they're accustomed to. The solution is gradual acclimation—increase light exposure slowly over 1-2 weeks, not all at once.
Moving containers to fix light problems is one of the great advantages of container gardening. Unlike in-ground plants that are stuck where they're planted, containers can be repositioned. I've moved containers dozens of times finding the right light for each plant. Too much sun? Move to partial shade. Not flowering? Move to more sun. This flexibility allows you to correct light mistakes and find optimal conditions through experimentation.
Choosing plants for your actual conditions is the ultimate solution. Instead of trying to force full-sun tomatoes to work in shade, grow shade-tolerant lettuce and herbs. Instead of killing shade plants in sun, grow sun-loving flowers and vegetables. Match plants to the light you actually have rather than trying to change your light conditions. I wasted two seasons fighting light limitations before accepting my shady balcony and planting accordingly. Instant success once I chose appropriate plants.
Mistake #6: Overcrowding Containers (Competition Kills)
The temptation to fill containers with many plants for fullness leads to problems down the road.
Too many plants in one container creates competition for every resource. Each plant needs water, nutrients, light, and root space. Three plants in a container means each gets 1/3 of resources. This might be okay for short-term displays but for productive growing or long-term health, it's problematic. I've planted three basil plants in an 8-inch pot and they all stayed small and weak. One basil in the same pot grew enormous and productive. The competition limited all three.
Root competition for nutrients and water is invisible but severe. Belowground, roots from different plants compete for the same soil volume. In containers with limited soil, this competition is intense. The strongest plant may dominate, stunting others. Or all plants may be weakened by competition. I've unpotted overcrowded containers and found densely packed roots from multiple plants tangled together with no soil visible—pure competition with no resources left.
Spindly growth from crowding happens because plants stretch trying to outcompete neighbors for light. Stems elongate, spacing between leaves increases, plants grow taller than they should while staying thin and weak. I've seen this in overcrowded lettuce—instead of developing nice heads, plants shoot up trying to get above neighbors. The result is useless spindly plants instead of harvestable lettuce.
Disease spread in crowded conditions is accelerated because there's no air circulation between plants. Humidity builds up, fungal spores settle on wet leaves, and disease spreads rapidly through the crowded planting. I've had powdery mildew devastate overcrowded containers while properly spaced plants nearby stayed healthy. The dense growth creates perfect conditions for disease development and spread.
Air circulation problems in overcrowded containers extend beyond disease. Poor air circulation also limits gas exchange (CO2 in, O2 out) that plants need for photosynthesis. It increases temperature (dense foliage traps heat). It prevents proper drying after rain or watering. The cumulative effect is stressed plants more vulnerable to all problems. Adequate spacing allows air movement through and around plants.
The "thriller, filler, spiller" trap is popular design advice (one tall plant, surrounding medium plants, trailing plants at edges) but often results in overcrowding. Following this formula can pack 5-7 plants into containers where 3-4 would be healthier. It looks full immediately but within weeks, competition emerges. I've done this many times, creating beautiful initial displays that decline within a month. Now I use fewer plants with adequate spacing.
Proper spacing guidelines by plant type vary significantly. Lettuce: 6-8 inches between plants. Tomatoes: one per 5-7 gallon container. Herbs: 4-6 inches between plants. Annuals: follow the spacing on plant tags (usually 8-12 inches). Vegetables generally need more space than ornamentals. I've learned to trust spacing recommendations rather than trying to cheat by crowding. Proper spacing always outperforms crowding in final results.
When and how to thin overcrowded containers: thin when you notice competition symptoms (spindly growth, yellowing, stunting). Remove the weakest plants, leaving the strongest. Be ruthless—better to have two thriving plants than five struggling plants. I thin seedlings regularly, removing extras even though it feels wasteful. The remaining plants flourish with adequate space. Thinning feels counterproductive but the results prove it's necessary.
Mistake #7: Neglecting to Fertilize (Starvation in Plain Sight)
Container plants need way more fertilizer than ground plants, and beginners often don't realize this until plants are already starving.
Why container plants need more fertilizer is simple: every watering leaches nutrients out the drainage holes. In the ground, nutrients move slowly through massive soil volumes—plants have time to absorb them. In containers, frequent watering means frequent nutrient loss. After a few weeks, most potting mix is nutritionally depleted. Without regular fertilizing, plants slowly starve despite looking fine initially.
Nutrient depletion from frequent watering is dramatic. I've tested this: containers watered daily show significant nitrogen depletion within 3-4 weeks. Containers watered every 3-4 days show depletion in 6-8 weeks. The more frequently you water, the faster nutrients wash away. Summer containers that need daily watering deplete nutrients rapidly and need fertilizing every 1-2 weeks. This isn't optional—it's necessary for plant survival.
Yellowing leaves and slow growth are the most common nutrient deficiency symptoms. Overall yellowing (especially lower/older leaves first) indicates nitrogen deficiency. Purple-tinged leaves may indicate phosphorus deficiency. Yellow leaves with green veins indicate iron deficiency. Slow growth despite adequate water and light often means general nutrient depletion. I see these symptoms in my containers and immediately increase fertilizing frequency.
Over-fertilizing versus under-fertilizing symptoms require distinction. Under-fertilizing: slow growth, small leaves, yellowing, poor flowering/fruiting. Over-fertilizing: brown crispy leaf tips and edges, salt crust on soil surface, rapid growth but weak stems, or even plant death in severe cases. I've done both. Under-fertilizing is more common and easier to fix. Over-fertilizing can damage plants quickly and requires flushing soil with water to remove excess salts.
Choosing the right fertilizer type depends on your plants and preferences. Balanced fertilizer (equal N-P-K like 10-10-10) works for most plants. Higher nitrogen (like 20-10-10) for leafy greens. Higher phosphorus/potassium (like 5-10-10) for flowering and fruiting. Slow-release granular fertilizer provides baseline nutrition for months. Liquid fertilizer provides immediate nutrition you can adjust. I use both: slow-release at planting, liquid every 2-4 weeks during growth.
Fertilizing schedule by plant type varies significantly. Heavy feeders (tomatoes, peppers, roses, annuals): fertilize every 1-2 weeks during active growth. Moderate feeders (most herbs, perennials): every 3-4 weeks. Light feeders (succulents, cacti): every 6-8 weeks or even less. I adjust frequency based on plant response—if growth is good, I maintain schedule. If plants show deficiency, I increase frequency.
Organic versus synthetic for containers is a personal choice with practical implications. Organic fertilizers (compost tea, fish emulsion, seaweed) release nutrients slowly and improve soil biology. Synthetic fertilizers provide precise nutrition immediately and are easier to use. I've used both successfully. For beginners, I recommend starting with synthetic liquid fertilizer (easy to apply, predictable results) and exploring organic options once you're comfortable with basics.
Salt buildup from over-fertilizing appears as white crusty deposits on soil surface. Salts from synthetic fertilizers accumulate over time. This buildup can damage roots and prevent water absorption. The fix: flush the soil by watering heavily (until water pours out drainage holes) to wash away accumulated salts. Or repot with fresh soil. I prevent buildup by periodically watering heavily to flush salts, even when fertilizing regularly. Prevention is easier than fixing severe buildup.
Mistake #8: Wrong Plants for Containers (Some Just Don't Work)
Not all plants are suited to container life, and trying to force incompatible plants causes frustration.
Plants with tap roots in shallow containers fail because they physically can't develop properly. Carrots need 12+ inches of depth for the root to grow straight. In 6-inch containers, they become stubby and deformed. Similarly, plants like dandelions or burdock with deep tap roots struggle in any container depth. I tried growing regular carrots in 8-inch containers and got 3-inch twisted carrots. In 12-inch containers, I got beautiful 8-inch straight carrots. Depth is non-negotiable for tap-rooted plants.
Invasive plants taking over include things like mint, which spreads via underground runners. In the ground, mint is nearly impossible to control. In containers, it's actually manageable because containers confine the roots. But if you plant mint with other plants in one container, mint will dominate and crowd out everything else. I've learned to keep invasive plants in their own dedicated containers. Mint gets its own pot, always. Never mixed with other plants.
Plants that outgrow any reasonable container shouldn't be attempted in pots. Large trees, big shrubs, bamboo (most varieties), and other massive plants will either stay stunted and unhealthy or require enormous containers (25+ gallons) that are impractical to manage. I've seen people try growing maple trees in containers—it's sad watching a plant that wants to be 40 feet tall struggle in a 10-gallon pot. Some plants just need to be in the ground.
Incompatible plant combinations in one container create problems. Mixing plants with different water needs (succulents with ferns) means one will be overwatered and one underwatered. Mixing aggressive spreaders with delicate plants means the aggressive plant dominates. Mixing shade-lovers with sun-lovers means conditions are wrong for one of them. I've learned to only combine plants with similar needs: water, light, nutrients, temperature. Compatibility matters.
Vegetables that fail in containers include those needing deep roots (like full-size corn—needs 18+ inches), those that spread aggressively (winter squash vines), and those that need specialized conditions hard to replicate in containers (asparagus, rhubarb). Some vegetables are container-unfriendly. I focus on container-friendly vegetables (tomatoes, peppers, lettuce, herbs, bush beans, compact varieties) and skip the ones that need in-ground growing.
Trees and shrubs that need ground planting include anything that will grow larger than you can accommodate in a container. Dwarf varieties bred for containers can work (dwarf citrus, dwarf conifers), but standard trees and large shrubs need the ground. I've seen people plant azaleas in containers where they stayed stunted and never thrived. Some woody plants just don't adapt to container life even if technically they can survive.
Annuals versus perennials in containers: annuals are perfect because they live one season and then you replant. Perennials are trickier because they live for years and either need repotting periodically, need winter protection, or need space to grow larger each year. I grow annuals extensively in containers (tomatoes, peppers, flowers). I'm more selective with perennials, choosing only those that truly thrive in containers long-term.
How to research before you plant: before buying any plant for containers, I now research its specific needs. How deep do roots go? How large does it get? Does it like containers? What are its water/light/nutrient needs? Five minutes of research prevents expensive mistakes. I check the plant tag, search online ("can you grow X in containers"), and look for compact varieties specifically bred for container growing. Research first, plant second.
Mistake #9: Temperature and Weather Ignorance (Heat, Cold, and Wind)
Container plants experience more extreme temperatures than ground plants, and ignoring this kills plants.
Containers heat up and cool down faster than ground due to limited soil mass and exposure on all sides. The ground has enormous thermal mass that moderates temperature. A container has minimal thermal mass. I've measured this: on a hot day, container soil can reach 95-100°F while ground soil nearby stays at 75°F. On a cold night, container soil can drop to 30°F while ground soil stays at 45°F. These extremes stress plants significantly.
Root cooking in dark containers in sun is a real problem. Dark pots absorb heat intensely. In full summer sun, black containers can heat soil to 110°F+—literally cooking roots. I've had plants in black containers show heat stress (wilting, stunted growth) while identical plants in light-colored containers thrived. The solution: use light-colored containers in full sun, or position dark containers where they get morning sun but afternoon shade.
Frost damage in containers versus ground is more severe because container soil freezes solid while ground soil stays warmer. I've lost perennials to winter in containers that would have survived in the ground. The exposed roots freeze completely in containers. Ground-planted roots are insulated by earth. For plants I want to overwinter in containers, I either bring them indoors, heavily insulate containers, or bury containers in the ground for winter.
Wind desiccation in exposed locations is brutal on container plants. Wind increases transpiration (water loss from leaves) and dries soil faster. Exposed balconies or rooftops can have wind that dries containers within hours. I've had containers in windy locations need watering twice daily while sheltered containers went 2-3 days. Wind also physically damages plants—breaking stems, shredding leaves. Windbreaks or sheltered positioning helps enormously.
Forgetting to water before heat waves has killed plants for me. I check weather forecasts and water thoroughly before predicted hot days (95°F+). Starting a hot day with saturated soil gives plants the best chance. Starting a hot day with already-dry soil means plants will be critically stressed by afternoon. I've lost plants by not watering adequately before heat waves. Pre-emptive watering before severe weather is critical.
Leaving containers out during freeze warnings causes damage or death. Many container plants are frost-tender and die at 32°F. Even hardy plants can suffer root damage when containers freeze solid. I monitor frost predictions closely and bring tender containers indoors before overnight freezes. I've forgotten and come out to frozen dead plants—entirely preventable losses from not watching weather.
Seasonal transitions and plant stress happen when you move plants abruptly between different conditions. Moving a plant from indoors (68°F stable) to outdoors (40-80°F variable) in one day causes shock. Moving from shade to full sun without acclimating causes scorch. I now transition plants gradually over 1-2 weeks, increasing exposure incrementally. Gradual acclimation prevents shock and allows plants to adapt.
Protecting containers from weather extremes includes: bringing tender plants indoors before frost, providing shade during extreme heat (shade cloth, temporary positioning), windbreaks for exposed locations (screening, repositioning), extra watering before heat waves, insulating containers for cold (bubble wrap, burlap, mulch), and monitoring weather forecasts constantly during extreme seasons. Weather protection requires active management but prevents major losses.
Mistake #10: Giving Up Too Soon (Impatience and Lack of Observation)
This mistake is more about mindset than technique, but it kills container gardening success as surely as any physical mistake.
Expecting instant results and getting discouraged happens because container gardening (like all gardening) takes time. Seeds take 1-2 weeks to germinate. Transplants take 2-3 weeks to establish. Growth is slow initially and accelerates later. I've seen people give up after 2-3 weeks saying "nothing's happening." Give plants time. Tomatoes take 60-90 days to produce fruit. That's 3 months of patience required. Expecting faster results leads to premature giving up.
Not observing what plants are telling you means missing critical information. Plants communicate through symptoms: drooping (needs water or has root problems), yellowing (nutrient deficiency or overwatering), stretching (needs more light), browning edges (too much sun or fertilizer). I've learned to actually look at plants daily and notice changes. Early symptom recognition allows early intervention. Ignoring symptoms until problems are severe makes fixing them harder.
Tossing plants that could be saved wastes money and learning opportunities. I've rescued plants that looked 90% dead by identifying and fixing the problem. A wilted plant with root rot can sometimes be saved by repotting, trimming damaged roots, and adjusting watering. A severely root-bound plant can recover after potting up. Only truly dead plants (stem completely brown and brittle) are unsaveable. Most struggling plants can recover if you diagnose and fix the problem.
Repeating the same mistakes without learning guarantees continued failure. I've watched people kill succulents in self-watering planters repeatedly without learning that succulents and constant moisture are incompatible. I did this with tomatoes in too-small containers for two seasons before finally learning. Repeating mistakes without analysis means you never improve. Learning from failure is how you develop skill.
Not keeping records of what works makes it hard to repeat success or avoid repeating failures. I started keeping simple notes: what I planted, when, in what container, results, problems. After a few seasons, patterns emerged. I could see that tomatoes in 5-gallon containers always disappointed while 7-gallon containers always succeeded. Records turn vague impressions into concrete knowledge. Simple notes (even phone notes) dramatically improve learning.
Failure to adjust care based on results means you're gardening on autopilot instead of responsively. If plants are yellowing, adjust fertilizing. If they're wilting daily, adjust container size or watering frequency. If they're stretching, adjust light exposure. I watch results continuously and adjust care accordingly. Container gardening isn't set-it-and-forget-it. It's constant observation and adjustment.
The learning curve is normal and everyone experiences it. I killed dozens of plants in my first two years. Every experienced container gardener has. The difference between people who succeed and people who quit is persisting through the learning curve. Each failure teaches you something if you pay attention. After 2-3 seasons of active learning, success rate increases dramatically. The learning curve is temporary—push through it.
Building container gardening intuition over time happens through accumulated experience. After years of growing in containers, I can look at a plant and usually identify what it needs—more water, different light, bigger container, fertilizer. This intuition isn't magic—it's pattern recognition from experience. Beginners don't have this yet, but you will after a few seasons of paying attention. Trust that intuition develops naturally with experience and observation.
How to Recover from These Mistakes
When you've made mistakes (and you will), here's how to fix them and save your plants.
Assessing plant damage honestly requires looking at symptoms objectively. How severe is the damage? Is the stem still firm and green, or brown and mushy? Are any roots still healthy white/tan, or are they all brown/black? Is any foliage still healthy, or is everything crispy/yellow? I've learned to assess realistically—some plants are too far gone to save. Knowing when to try versus when to start over saves time and effort.
Emergency repotting techniques for severely damaged plants: carefully unpot the plant, remove as much old soil as possible, trim away any dead/damaged roots (brown, mushy, smelly roots), rinse remaining healthy roots, repot in fresh potting mix in appropriate-sized container with excellent drainage, water lightly, place in shade for a few days to recover from repotting shock. I've saved badly damaged plants this way, though success isn't guaranteed. Worth trying before giving up entirely.
When to start over versus try to save depends on damage severity and your goals. Start over if: roots are >90% rotten, stem is completely dead (brown and brittle all the way to soil line), the plant is a cheap annual easily replaced, or saving it requires more effort than it's worth to you. Try to save if: stem is still alive (green under bark), some healthy roots remain, it's a valuable plant (expensive, sentimental, or hard to replace), or you want the learning experience.
Rehabilitation timeline and expectations: most rescued plants show signs of recovery (new growth) within 2-4 weeks if the intervention worked. Full recovery might take 6-12 weeks or even longer for severely damaged plants. Don't expect instant results. After emergency repotting, I give plants a month before deciding if they'll make it. Some recover quickly, some slowly, some not at all. Patience during rehabilitation is essential.
Preventing repeated mistakes requires understanding what went wrong and why. Don't just fix the problem—understand its cause. If roots rotted, was it overwatering? Poor drainage? Both? If plants stretched, was it insufficient light? Wrong plant choice? I analyze failures to prevent recurrence. Making the same mistake once is learning. Making it repeatedly is not paying attention.
Creating systems to avoid future problems means building routines and safeguards. Examples: daily morning plant check routine (prevents forgetting), labeled containers indicating plant needs (prevents watering mistakes), calendar reminders for seasonal tasks (prevents missing critical timing), keeping fertilizer with watering can (prevents forgetting to fertilize). Systems make correct care automatic rather than requiring constant memory.
Learning from failures productively means viewing dead plants as education, not just loss. Each failure teaches you something: wrong container size, incompatible plant, poor drainage, whatever. I keep mental (and sometimes written) notes of failures and their lessons. This accumulated knowledge makes future success more likely. Dead plants are expensive lessons—make sure you actually learn the lesson so the expense wasn't wasted.
The compound effect of fixing multiple mistakes is greater than the sum of individual fixes. Fixing just drainage helps some. Fixing just container size helps some. Fixing drainage AND container size AND fertilizing AND watering consistency helps enormously. I've seen plants go from barely surviving to thriving when I fixed 3-4 mistakes simultaneously. Don't just fix one thing—audit all potential mistakes and fix everything that's wrong.
Prevention: Setting Up for Success from the Start
The best way to avoid mistakes is preventing them through good initial setup.
Choosing quality containers and materials starts with: containers with multiple drainage holes, appropriate size for your plants, durable materials (UV-resistant plastic, glazed ceramic, resin), and quality potting mix (not garden soil). I've learned that cheaping out on basics causes problems later. Better to start with fewer high-quality containers than many cheap containers that create problems. Quality basics prevent multiple mistakes from the start.
Starting with easy plants for experience builds confidence and skills before attempting challenging plants. Easy container plants include: cherry tomatoes, basil, lettuce, marigolds, petunias, zinnias, pothos, and snake plants. These tolerate mistakes better and provide encouragement through success. I recommend beginners start with 3-5 easy plants, master those, then expand to more challenging ones. Success with easy plants teaches the basics that apply to harder plants.
Creating maintenance routines makes care automatic rather than something you have to remember. My routine: morning plant check (every day), water as needed based on finger test, fertilize every 2 weeks during growing season, check for pests/disease weekly, deadhead flowers weekly, harvest vegetables as they ripen. This routine is second nature now—I don't have to think about it. Established routines prevent neglect and catch problems early.
Keeping simple records accelerates learning. I keep basic notes on my phone: what I planted, when, in what container size, results (yields, success/failure), problems encountered, solutions tried. After a season or two, these notes are invaluable reference. I can see what worked and what failed. I can avoid repeating mistakes. I can replicate successes. Notes don't need to be elaborate—even simple bullet points help enormously.
Understanding your limitations and working within them is critical for sustainable container gardening. If you travel frequently, stick to self-watering planters or drought-tolerant plants. If you're forgetful, grow fewer plants that you can manage. If you have limited time, choose low-maintenance plants. I've learned my limitations (impatient, sometimes forgetful, limited time) and design my container garden accordingly. Working within limitations is smarter than fighting them.
Investing in the right tools makes care easier and more effective. Essential tools: quality watering can, good potting mix, appropriate fertilizer, moisture meter or probe, pruning shears, drill for adding drainage holes, appropriate containers. I've accumulated these over time. Good tools aren't expensive ($100-200 total) and make a huge difference in ease and success. Cheap or wrong tools make everything harder.
Finding reliable information sources prevents learning from bad advice. Good sources: university extension websites (research-based), experienced gardeners in your area (climate-relevant), established gardening books (time-tested), and your own experimentation (tailored to your conditions). Bad sources: random internet articles with no sourcing, generalized advice not specific to containers, influencers who don't actually show long-term results. I verify information from multiple sources before trusting it.
Building skills progressively means not trying to do everything at once. Start with basic annual flowers or vegetables. Learn watering, fertilizing, and light management. Then add more plants or try more challenging varieties. Then experiment with advanced techniques. I see beginners try to grow 30 different plant varieties in their first season and get overwhelmed. Start small, master basics, expand gradually. Progressive skill-building leads to sustainable success.
The Most Common Mistake Combinations
Mistakes rarely occur in isolation—they compound and create cascading failures.
Wrong soil plus wrong container size is a particularly deadly combination. Garden soil in an undersized container compacts severely and becomes concrete-like, suffocating roots completely. I've seen plants in this situation die within weeks. The combination is worse than either mistake alone. If you've made both mistakes, fixing both simultaneously (repot with proper mix in proper size) is necessary for plant survival.
Overwatering plus poor drainage creates root rot almost guaranteed. Overwatering means soil stays too wet. Poor drainage means excess water can't escape. Together, these create permanently saturated conditions that kill roots. This combination is extremely common—people overwater containers without adequate drainage. I've done this many times before understanding the connection. Fixing either problem helps, but fixing both is necessary for success.
Wrong light plus wrong plant choice is a setup for failure before you even start. Planting full-sun tomatoes in a shady spot combines incompatible light with a high-light plant. The plant never had a chance. I've made this mistake repeatedly trying to grow vegetables in insufficient light. The solution: either change the plant (choose shade-tolerant plants) or change the location (move containers to better light). You can't overcome fundamental incompatibility.
Overcrowding plus inadequate fertilizing starves all plants simultaneously. Crowded plants already compete for limited resources. Without adequate fertilizing, there aren't enough nutrients for even one plant, let alone three competing plants. All plants become stunted and weak. I've had containers where overcrowding created competition and I didn't realize they needed more frequent fertilizing to compensate. The combination prevents any plant from thriving.
Inconsistent watering plus extreme temperatures multiplies stress. Inconsistent watering stresses plants. Heat waves stress plants. Combined, the stress can be fatal. I've lost plants during heat waves because I'd been inconsistently watering them leading up to the heat—they were already weakened when temperature stress hit. Consistent watering before weather extremes is critical. The combination of multiple stressors is more damaging than individual stressors.
Why multiple mistakes compound damage: each mistake weakens the plant, making it more vulnerable to other problems. A plant struggling from poor drainage is more vulnerable to nutrient deficiency. A plant stressed from wrong container size is more vulnerable to pest attacks. Healthy plants tolerate mistakes better. Weakened plants cascade into failure when multiple mistakes combine. This is why fixing one mistake sometimes isn't enough—you need to fix all of them.
Fixing systemic problems versus individual issues requires looking at the whole picture. If I have one plant dying, it's probably an individual issue with that plant. If ALL my tomatoes are failing, it's systemic—wrong container size, wrong soil, wrong fertilizing schedule, something affecting all of them. Systemic problems require systemic solutions—changing my overall approach, not just fixing individual plants. I look for patterns in failures to identify systemic issues.
Identifying your specific mistake patterns through observation reveals which mistakes you're prone to. Some people consistently overwater. Some consistently underwater. Some always choose too-small containers. Some always over-fertilize. I've identified my patterns (impatient, sometimes inconsistent watering, tendency to overcrowd) and built systems to compensate. Knowing your specific vulnerabilities allows targeted prevention.
Success Stories: Fixing These Mistakes
Real examples of how fixing mistakes transformed plant success:
Tomato transformation from 5 fruits to 50 happened when I fixed container size. First year: 'Sungold' cherry tomato in 3-gallon container produced maybe 5 tomatoes total. Sad. Second year: same variety in 7-gallon container produced 150+ tomatoes. The only change was container size. This dramatic difference convinced me that container size matters enormously for productive vegetables. I now size tomatoes properly (5-7 gallons minimum) and yields are consistently excellent.
Rescuing root-bound houseplants brought several struggling plants back to vigorous health. I had pothos that hadn't grown in 6 months—turned out to be severely root-bound in a too-small pot. I repotted to a 2-inch larger container. Within three weeks, vigorous new growth appeared. Within two months, it had grown more than in the previous year. The transformation from fixing one mistake (wrong size) was dramatic. Root-bound plants respond incredibly well to proper sizing.
Fixing drainage and saving drowning plants through emergency repotting saved a beautiful pepper plant. It was wilting despite wet soil—classic root rot. I unpotted, discovered mushy roots and no drainage holes in the decorative pot. I drilled drainage holes, trimmed damaged roots, repotted in fresh soil. The plant recovered within two weeks and went on to produce peppers. Without intervention, it would have died. Fixing drainage saved it.
Light adjustment success stories include moving shade plants from sun to shade and watching them recover. I had ferns that were scorched and struggling in afternoon sun. I moved them to morning-sun-only location. The scorched leaves stayed damaged but new growth emerged healthy and lush. Within a month, they looked like completely different plants. Moving containers to proper light fixes light mistakes quickly and dramatically.
Container size correction results are consistently impressive. Every time I've moved a plant from too-small to appropriate container, growth accelerates noticeably. Root vegetables develop properly instead of becoming stunted. Flowers bloom more prolifically. Vegetables produce heavier yields. The pattern is consistent: right-sizing produces better results within weeks. This is one of the easiest mistakes to fix with reliable improvement.
Real before-and-after examples I've documented include: basil that went from 8 inches and straggly in poor light to 24 inches and bushy in good light (4 weeks after moving), tomatoes that went from zero fruit in 3-gallon containers to 50+ fruits in 7-gallon containers (same variety, following season), peppers that went from constant blossom drop to steady production after I started watering consistently (same plants, mid-season adjustment). The transformations from fixing mistakes are real and dramatic.
What changed and why it worked in each case: container size gave roots room to grow and soil volume for nutrients/water. Light adjustment provided energy for growth and photosynthesis. Drainage allowed oxygen to roots and prevented rot. Consistent watering eliminated stress cycles. The fixes worked because they addressed the actual limiting factors—the mistakes that were preventing success. Identifying and fixing the real problem (not just symptoms) produces results.
Lessons that apply to your situation: most container gardening failures come from a small set of common mistakes. If your plants are struggling, you're probably making 1-3 mistakes from this list. Diagnose which mistakes apply to your situation. Fix them. Results usually follow within weeks. The lessons I learned apply broadly—proper soil, proper size, proper drainage, proper light, proper watering, proper fertilizing. Get these basics right and most problems disappear.
Building a Container Garden That Thrives
Moving beyond avoiding mistakes to creating sustained success:
Starting small and scaling up is the path I recommend after learning this the hard way. Start with 3-5 containers, all with easy plants. Master caring for those. Then add more. I started with 20 containers my first season and couldn't keep up. I was overwhelmed and many plants died from neglect. Now I maintain 25 containers comfortably—but I built up to that over several seasons. Start smaller than you think you want. You can always add more later.
Choosing the right plants for your space means matching plants to your actual conditions: light available, time available, space available, climate, and your interests. I grow what works in my space: tomatoes, peppers, herbs, and shade-loving houseplants. I've stopped trying to grow things my space doesn't support. This focused approach produces success instead of constant frustration from fighting impossible limitations.
Creating sustainable care routines means routines you can actually maintain long-term, not aspirational routines you'll abandon. My routine is realistic for my life: morning check (5-10 minutes), water as needed, fertilize every 2 weeks (5 minutes), occasional maintenance (10 minutes weekly). Total time: maybe 60-90 minutes per week. This is sustainable. A routine requiring daily hour-long sessions wouldn't be. Design routines you'll actually do.
Matching ambition to available time prevents overcommitting and subsequent failure. If you have 30 minutes per week for container gardening, maintain containers that fit that time budget—maybe 5-8 containers with low-maintenance plants. If you have 2 hours per week, you can manage more containers or more demanding plants. I've learned my realistic time budget (1-1.5 hours weekly) and keep my container garden within that limit. Exceeding your time budget leads to neglect and failure.
Seasonal planning and transitions keep the garden productive year-round. I plan: spring (cool-season greens, early starts), summer (tomatoes, peppers, basil, flowers), fall (second round of greens, late harvests), winter (houseplants, planning for next season). Transitions between seasons are planned—I start fall plants before summer ones finish. This continuous planning prevents gaps where containers sit empty or plants sit too long past their prime.
Troubleshooting as problems emerge means catching issues early and addressing them immediately. I check plants daily and notice when something looks off. Yellowing? Check fertilizer schedule and soil moisture. Wilting? Check watering and roots. Stretched growth? Check light. I don't wait for problems to become severe—I intervene at first symptoms. Early intervention is way more effective than trying to rescue severely damaged plants.
Celebrating successes and learning from failures creates positive reinforcement and continuous improvement. I actively appreciate when things go well—admire beautiful plants, enjoy homegrown tomatoes, feel satisfied by lush container gardens. I also analyze failures without self-criticism—what went wrong, what can I learn, what will I do differently. Both celebration and analysis drive improvement. Container gardening should be enjoyable, not just problem-solving.
Long-term container gardening success comes from accumulated knowledge, established routines, appropriate plant choices, realistic scope, and continuous learning. After several seasons, container gardening becomes easy—not because the plants are less demanding, but because you've learned what they need and how to provide it efficiently. The skills compound. The intuition develops. The success becomes consistent. Stick with it through the learning curve and it gets much easier.
Conclusion
After everything we've covered, here's what I want you to remember: these ten mistakes kill more container plants than all other problems combined, but every single one is preventable and most are fixable.
The 10 mistakes we covered: using garden soil instead of potting mix, wrong container size (too small or too large), inadequate drainage, inconsistent watering, ignoring light requirements, overcrowding containers, neglecting to fertilize, choosing wrong plants for containers, ignoring temperature and weather, and giving up too soon. These aren't exotic problems—they're everyday mistakes that almost everyone makes at some point.
The fixes are straightforward once you know what to look for: use proper potting mix, size containers appropriately for each plant, ensure multiple drainage holes, water based on soil moisture not schedules, match light to plant needs, space plants adequately, fertilize regularly, choose container-appropriate plants, protect from weather extremes, and persist through the learning curve. None of these fixes are complicated or expensive—they're mostly about knowledge and attention.
Start by fixing 2-3 of these mistakes rather than trying to fix everything at once. Look at your current containers and honestly assess: which mistakes am I making? Pick the 2-3 that seem most relevant to your failures. Fix those. See how your plants respond. Then address other issues. Trying to fix everything simultaneously is overwhelming. Systematic improvement works better.
Remember that every experienced container gardener has made these mistakes—I've made all ten multiple times. The difference between experienced gardeners and beginners isn't that we don't make mistakes; it's that we've made them before, learned from them, and developed systems to prevent repetition. Your mistakes aren't personal failures—they're normal parts of the learning process. Every dead plant teaches you something if you pay attention.
I encourage you to share which mistakes you've made in the comments. Talking about failures helps everyone learn. I've learned as much from other people's mistakes as from my own. Knowing you're not alone in struggling with particular issues is both reassuring and educational. Share your failures, share your successes, share what you're still figuring out.
Final encouragement: container gardening success is absolutely achievable. I went from killing 85% of plants my first season to maintaining thriving productive container gardens now. The transformation wasn't magic—it was learning to avoid these mistakes. You can do the same. Start small, learn from both successes and failures, fix mistakes as you identify them, and be patient with yourself through the learning curve.
Your container garden can thrive. Mine does now, after years of learning. Yours will too, once you avoid these common pitfalls. Now go check your containers, identify which mistakes you're making, and start fixing them. Your plants will thank you!