Container Gardening Carrots: The Complete Guide to Growing Carrots in Pots
Learn everything about container gardening carrots — the best varieties, right containers, soil prep, watering, and harvesting. Real tips from someone who's grown carrots in pots for years.
CONTAINER TINY PLOTS: CROPS, SOIL & CLEVER HACKS
Introduction
Here's something that trips up a lot of gardeners: carrots have one of the highest failure rates of any commonly grown vegetable, and the vast majority of those failures come down to one thing — soil. Rocky soil makes carrots fork and twist. Clay soil stops roots from developing properly. Compacted soil produces stunted, misshapen carrots that bear no resemblance to what's on the seed packet. I've talked to dozens of gardeners who tried growing carrots in-ground, got deformed or nonexistent results, and concluded they simply couldn't grow carrots. Every single one of them could grow carrots just fine — they just needed to get out of the ground and into a container.
Container gardening for carrots is one of those rare situations where the alternative to in-ground growing isn't a compromise — it's genuinely superior. You control the soil completely. You eliminate the compaction and rocky texture problems that ruin in-ground carrots. You can place your container exactly where it gets the right light. You can move it to protect from hard frost or excessive heat. And you can grow carrots on a balcony, a patio, a deck, or a rooftop where in-ground growing isn't even an option. I've been growing carrots in containers for years and my success rate went from frustrating to genuinely excellent the moment I stopped fighting my clay soil and started growing in pots.
There are some specific things to get right with container carrots — depth is critical, soil mix is critical, variety selection matters enormously — and this guide covers all of it in practical detail. By the end of this article you'll know exactly which container to use, which varieties to plant, how to prepare your soil, and how to take your carrots from seed to harvest without the deformed, forked, disappointing results that haunt so many gardeners' in-ground attempts. Let's grow some straight, beautiful, genuinely sweet carrots.
Why Containers Are Actually Better for Growing Carrots
Let me make the case directly, because I think it's worth being explicit about why containers aren't a consolation prize for carrot growing — they're an upgrade. The problems that most commonly ruin in-ground carrots are essentially eliminated by containers, and the control you gain over growing conditions creates an environment where carrots genuinely thrive.
The soil problem is the big one. Carrots are taproots — they grow by pushing downward through the growing medium, and that downward growth is only as straight and unobstructed as the medium allows. Any rock, pebble, clump of clay, or dense compacted zone that the developing carrot root encounters causes it to fork around the obstruction, producing the twisted, bifurcated, comedically misshapen carrots that end up in gardening failure photos. Most garden soil — unless you've spent years building it with amendments and careful cultivation — contains enough rocks, clay, and compaction to reliably produce deformed carrots. Container soil, mixed from scratch with carefully chosen components, has none of those obstructions. The carrot root pushes down through loose, uniform, rock-free medium and grows straight. It really is that straightforward.
Temperature and drainage control are practical advantages that matter more than most people initially realize. Carrots are cool-season crops that produce their best flavor — including that characteristic carrot sweetness — when temperatures are moderate to cool. In a container, you can move the pot to the shadiest, coolest spot in your growing area during summer heat and back to the sunniest spot in autumn when temperatures drop. In-ground carrots are at the mercy of whatever conditions exist in their fixed location. Container drainage is also completely controllable — you choose the soil mix and the container, so you know exactly how well water moves through the root zone. Waterlogged carrot roots rot. Well-drained container soil prevents that entirely.
Pest management is a genuine benefit that I didn't fully appreciate until I compared my container carrot experience to what friends with in-ground beds were dealing with. Carrot fly — whose larvae tunnel through carrot roots producing rusty orange trails and making roots inedible — is a significant pest in many regions for in-ground carrots. The larvae hatch from eggs laid by flies attracted to the scent of carrot foliage, and they enter the soil and find roots through soil-level access. Elevated containers — on a table, on a balcony railing shelf, or simply raised off the ground — significantly reduce carrot fly damage because the flies tend to fly low and struggle to find elevated containers. Even ground-level containers can have protective fleece placed over them during the egg-laying period more easily than an entire bed can be covered.
The year-round growing potential that container mobility provides is something that in-ground carrot growers simply can't match. A container of carrots can be moved to a frost-protected location when late-season freezes threaten. It can be brought onto a covered porch to extend the growing season. It can be positioned in the most favorable microclimate in your growing area — against a warm wall for heat in early spring, in dappled shade for cooling in summer. That mobility is especially valuable in climates where growing windows are compressed and every extra week of production matters.
Choosing the Right Container for Carrots
Container selection is the most consequential setup decision in container carrot growing, and depth is the dimension that matters most. Getting the depth wrong — choosing a container that's too shallow for the variety you're growing — is the single most common container carrot mistake and the one most likely to produce the same disappointing stunted results that plague in-ground growing in compacted soil.
Depth requirements for container carrots depend directly on the mature length of the variety you're growing. As a minimum baseline, twelve inches of soil depth is required for the shortest round and stubby carrot varieties. Chantenay and Danvers types — medium-length carrots — need a minimum of twelve to fourteen inches. Anything deeper is better. Longer varieties like Imperator types that reach eight to ten inches at maturity need at minimum sixteen inches, and honestly I'd recommend avoiding these in containers altogether and choosing shorter varieties that are purpose-suited to container depth constraints. When measuring container depth, measure the actual soil depth available — not the external container height, which includes the container wall thickness and typically some headspace above the soil level.
Width and volume determine how many carrots you can grow per container and affect the economics and productivity of your container carrot setup. A twelve-inch diameter pot can accommodate perhaps eight to twelve carrot plants at appropriate spacing. A fifteen-gallon fabric pot with a wider diameter can support twenty or more carrots. A long window box or trough container — twelve inches deep and thirty inches long — can produce a substantial crop of short varieties in a narrow space. More volume also means more stable moisture and temperature conditions in the root zone, which benefits root development and carrot quality.
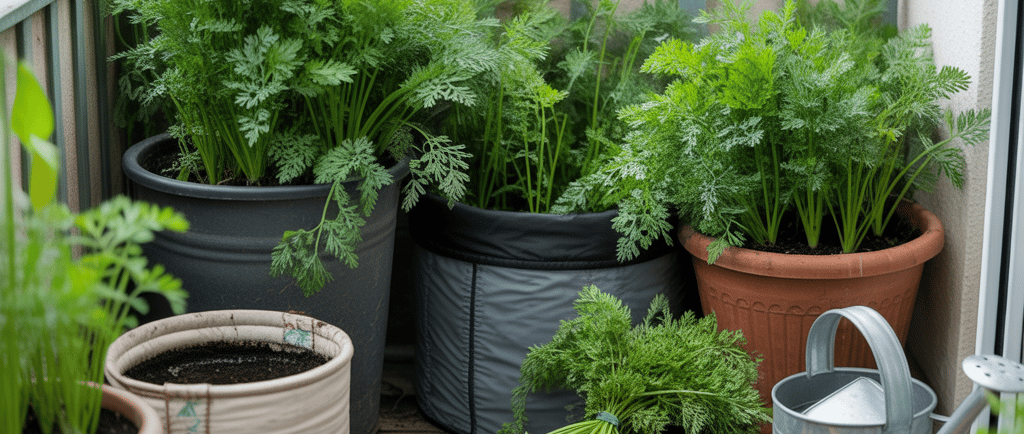
Fabric grow bags have become my preferred container for carrots after experimenting with multiple options. The breathable fabric walls provide excellent drainage, prevent the water retention that causes root rot, and allow air pruning of roots that reach the container walls — the same benefit that makes fabric pots excellent for fruit trees. The flexibility of fabric bags also makes harvesting easier than rigid containers: rather than trying to dig roots out of a fixed container without breaking them, you can simply tip the fabric bag over and peel the sides back to expose the soil and roots for easy harvest. Five-gallon, ten-gallon, and fifteen-gallon fabric bags work well for carrots depending on the quantity you want to grow. They're lightweight, cheap, and store flat when not in use.
Plastic containers are a practical second choice — cheaper than terracotta, lighter than wood or ceramic, and available in the depth dimensions carrots need. The main limitation of plastic for carrots is that plastic retains heat more than fabric or terracotta, which can warm the root zone uncomfortably in summer. Managing this through placement in shade during hot weather and using lighter-colored plastic containers that reflect heat rather than absorbing it addresses this limitation adequately. Terracotta pots are beautiful and breathable but heavy — a twelve-inch terracotta pot filled with moist carrot-appropriate soil weighs a significant amount and becomes difficult to move, which undermines the container mobility advantage. For growing positions that won't need to be moved, terracotta is fine. For setups where mobility is important, fabric or plastic is more practical.
Wooden planter boxes are excellent for carrots when built to appropriate depth — at least twelve to fourteen inches for short varieties. Wood is insulating, which moderates soil temperature fluctuations better than plastic or terracotta. It's also aesthetically pleasing on a patio or balcony. The limitation is weight and the need to line wooden containers with landscape fabric to prevent soil from washing through gaps while still maintaining drainage. Wooden planters also eventually rot, particularly at the base where soil contact and moisture are continuous — using rot-resistant wood like cedar or lining the interior with a pond liner extends life significantly.
The Best Carrot Varieties for Container Growing
Variety selection for container carrots is genuinely important in a way that it isn't for many other container vegetables, because the length of the mature root determines whether your container is deep enough to grow full-sized, quality carrots. Choosing varieties bred or selected for compact root systems eliminates the depth constraint entirely and produces excellent results in standard container depths.
Chantenay carrots are my personal favorite for containers and the variety type I recommend most enthusiastically to beginners. Chantenay types grow to four to five inches in length but compensate with significant girth — a broad, chunky root that's wider at the shoulder than at the tip, giving it a distinctive almost-conical shape. That width means good yield in terms of carrot mass despite the shorter length, and the flavor of well-grown Chantenay carrots is excellent — sweet, rich, and genuinely carrot-flavored in the way that grocery store carrots often aren't. 'Red Cored Chantenay' and 'Royal Chantenay' are the classic varieties, widely available and reliably performing. They need a minimum of ten to twelve inches of soil depth, making them the most forgiving variety for modest container depths.
Paris Market carrots — also called Amsterdam types or round carrots — are the most container-friendly carrots in existence because they're essentially spherical rather than elongated, growing to about an inch and a half to two inches in diameter and barely deeper than that. They look like little carrot balls. They're genuinely cute and they taste excellent — very sweet, tender, with thin skin that doesn't need peeling. In a container as shallow as eight inches they grow perfectly, which means they work in window boxes, shallow troughs, and any container that other varieties would find too shallow. 'Parmex' and 'Tonda di Parigi' are the classic round carrot varieties. As a bonus, kids find them absolutely delightful and they're a genuinely fun variety to grow with children.
Thumbelina carrots are similar to Paris Market types in their compact, rounded form and are probably the most famous of the truly compact container carrot varieties. Widely available from most seed suppliers, reliably sweet, and quick to mature — typically fifty-five to sixty days — they're an excellent starting point for someone new to container carrots who wants reliable, fast results.
Nantes types — cylindrical, blunt-ended carrots growing to six to seven inches — sit in the middle ground between the shortest varieties and the long types. They need twelve to fourteen inches of soil depth and reward that depth with excellent flavor — Nantes types are considered among the best-tasting carrot types by most carrot enthusiasts. 'Scarlet Nantes' and 'Touchon' are classic Nantes varieties. The shorter end of the Nantes length range — some Nantes types stay closer to five inches — work comfortably in fourteen-inch deep containers.
Colorful carrot varieties — the purple, yellow, white, and red types that have become increasingly available over the last decade — are worth growing in containers specifically because containers are often in visible, high-interest locations where a tray of colorful carrot tops and the eventual harvest of rainbow-colored roots creates genuine visual delight. 'Purple Haze' is a hybrid purple carrot with excellent flavor. 'Yellowstone' produces beautiful butter-yellow roots. 'White Satin' is creamy white with mild, sweet flavor. 'Cosmic Purple' and 'Solar Yellow' are shorter types suitable for container depth constraints. A container of mixed colorful carrot varieties harvested together is one of the most visually satisfying things in the container vegetable garden.
What to avoid: any variety labeled as Imperator type, which grows eight to ten inches and needs sixteen-plus inches of container depth to grow properly. Varieties with long descriptions of mature root length on the seed packet — anything over six inches — are risky for standard container depths. The longer types can technically be grown in deep enough containers, but the depth required starts to get impractical for most container setups, and the shorter varieties produce better results more reliably in the depths that apartment and patio containers realistically achieve.
The Perfect Soil Mix for Container Carrots
Soil mix is where container carrot growing either succeeds or replicates the failures of in-ground growing in clay and compacted soil. The requirements are specific and genuinely different from the requirements for most other container vegetables — and standard potting mix straight from the bag, which works acceptably for most container crops, is not well-suited to carrot root development.
The problem with standard potting mix for carrots isn't quality — it's texture and composition. Most potting mixes are formulated for root crops that grow in the top few inches of the container rather than for taproots that push down through the full depth of the soil. They often contain bark pieces, perlite chunks, or fibrous materials that, while harmless to surface-rooting plants, can deflect a developing carrot root the same way a pebble deflects an in-ground carrot. They also tend toward moisture retention that's appropriate for plants watered from the surface but can create conditions that are wetter than ideal for carrot roots at depth.
The ideal container carrot soil mix is light, uniform in texture, free of any material large enough to deflect a developing root, and well-draining without being bone dry. My go-to mix is roughly equal thirds fine-textured potting mix, coarse horticultural sand, and either coco coir or perlite. The fine potting mix provides the organic matter and nutrient base. The coarse sand improves drainage and creates the loose, friable texture that carrot roots push through easily. The coco coir or perlite further lightens the mix and improves the aeration that carrot roots need. The result is a mix that holds together in the container but crumbles easily in your hand — light enough that you can push your finger through it to full depth without resistance.
Before filling the container, sift the potting mix component through a colander or coarse screen to remove any large bark pieces, chunks, or debris that could obstruct root development. This step takes an extra few minutes and makes a meaningful difference in the uniformity of root development. Combine the sifted potting mix with sand and coir or perlite, mix thoroughly, and moisten lightly before filling the container — pre-moistened soil settles more evenly and prevents the air pockets that dry soil can create.
Nutrient content of the carrot soil mix requires some specific thinking. Carrots are not heavy feeders — they don't need the rich, high-nitrogen mix that leafy greens or fruiting vegetables want. In fact, excess nitrogen is actively detrimental to carrot quality — too much nitrogen produces lush, abundant foliage at the expense of root development, exactly the opposite of what you want. A moderate-fertility base mix provides what carrots need. Avoid mixing large quantities of fresh compost into the carrot soil — the high nitrogen in fresh compost causes the forking and hairy root development that characterizes nitrogen-excess carrot problems. A small amount of well-aged, fully decomposed compost is fine and provides a gentle nutritional background without the nitrogen spike of fresh material.
Avoiding compaction is something to think about both when filling the container and throughout the growing season. Fill the container by pouring the soil mix in loosely rather than pressing or packing it down — let it settle naturally. After rain or repeated watering, the soil surface sometimes crusts over, creating a barrier that can impede seedling emergence and increase surface runoff. Breaking this surface crust gently with a fork or your fingers before watering maintains the loose surface that carrot seedlings need to push through as they emerge.
Planting Carrot Seeds in Containers
Carrots must be direct sown — planted as seeds directly in the container where they'll grow to maturity — rather than started as transplants and moved. This is a non-negotiable characteristic of carrot growing that differentiates them from most other vegetable crops. The taproot that begins developing immediately upon germination is sensitive to any disturbance, and transplanting — which invariably disturbs the developing root — produces forked, stunted, or dead plants. Plant the seeds where you want the carrots to grow and leave them there.
The seed spacing question for container carrots is a balance between planting densely enough that the container space is used efficiently and thinly enough that each carrot has adequate room for root development. For most short and medium varieties, seeds can be scattered across the container surface at roughly half-inch to one-inch intervals — much closer than they'll ultimately be grown. This dense initial seeding compensates for the typically uneven germination rate of carrot seeds (which are notoriously variable germinating, particularly in older seed stock), ensuring adequate coverage even if some seeds fail to germinate. The important step — thinning, which I'll cover in the care section — brings the stand to the final appropriate density after germination.
Seeding depth for carrots is very shallow — a quarter inch at most, and some experienced growers barely cover the seeds at all, simply pressing them into the moistened soil surface and covering with a thin layer of fine growing medium or vermiculite. Carrot seeds are small and have limited energy reserves for pushing through soil — deep planting means the seedling exhausts itself before reaching light. The covering layer should be as fine-textured as possible, which is why some growers use a thin layer of vermiculite over carrot seeds rather than potting mix — vermiculite stays loose and doesn't crust over, giving the delicate seedling a clear path to the surface.
Germination timeline for carrots is slower and more variable than most vegetables, and this catches beginners off guard. Under ideal conditions — soil temperature around 65°F to 75°F, consistent moisture — carrot seeds germinate in seven to fourteen days. Under cooler conditions, germination can take three weeks or more. Under hot conditions above 85°F, germination rate drops significantly. The wide germination window means patience is required — seeing nothing on the surface for two weeks doesn't mean the seeds have failed. It means they may be germinating slowly. Carrot seed viability also declines faster than many vegetable seeds — seeds more than two or three years old may germinate at dramatically reduced rates.
Keeping carrot seeds moist during germination is the most critical and most commonly failed aspect of the planting process. Carrot seeds are in the soil surface zone — the inch or so closest to the surface — that dries out fastest, particularly in the warm, dry conditions of indoor growing or hot-weather outdoor growing. If the seeds dry out completely during germination, they die. Maintaining consistent moisture through the two-week or longer germination period requires checking the container daily and misting the surface whenever it shows any sign of drying. Covering the container with plastic wrap or a humidity dome during the germination period dramatically reduces moisture evaporation and the frequency of watering needed — remove the cover as soon as the first seedlings emerge to prevent damping off. Placing the container in partial shade during germination also reduces evaporation without affecting germination rate.
Watering Container Carrots Correctly
Watering is where more container carrot grows go wrong than anywhere else after variety selection and soil preparation, and the mistakes tend to be opposite types — either too much surface watering that keeps the top of the soil perpetually wet while the deeper root zone stays dry, or inconsistent watering that leads to the carrot quality problems that manifest as splitting, bitter flavor, and poor root development.
The fundamental principle for watering container carrots is deep, infrequent watering rather than frequent shallow watering. Carrot roots grow downward through the full depth of the container, and the quality and flavor of those roots depend on the entire root zone receiving adequate moisture — not just the top few inches. Deep watering means adding enough water that it penetrates to the bottom of the container and flows from the drainage holes — the entire soil column has been moistened. This encourages carrot roots to grow deep and develop fully rather than staying near the surface where the soil is consistently moist from frequent shallow watering.
The frequency of deep watering depends on your container material, soil mix, weather, and plant size. As a starting guideline, water when the top inch of soil has dried out — check by pressing a finger into the soil surface. In warm weather with small containers this may be every day or every other day. In cool weather or large containers it may be every three to five days. As carrot plants grow larger and begin drawing more moisture, watering frequency naturally increases. The key signal is soil moisture at the surface rather than a fixed schedule — conditions change and a schedule that was right last week may be wrong this week.
Avoid the common mistake of light surface watering that wets only the top inch or two of soil. This creates a perverse incentive for carrot root development — roots grow toward moisture, so a consistently wet surface and dry lower soil profile encourages shallow root growth rather than deep development. The same problem that makes surface watering counterproductive in regular gardening is amplified for carrots because root depth and quality are the entire point. Water deeply every time you water.
Mulching the surface of your container carrot soil is one of the most practical steps for consistent moisture management. A half-inch to one-inch layer of fine organic mulch — compost, fine straw, or shredded leaves — over the soil surface dramatically reduces evaporation from the top of the container, keeps soil temperature more consistent, and reduces the frequency of watering needed. For carrot germination, hold off on mulching until seedlings have clearly emerged — the mulch layer can impede emergence of the very delicate carrot seedlings. Once seedlings are an inch or two tall, apply mulch carefully around them, keeping the stems clear.
Overwatering symptoms in container carrots are worth knowing because they're sometimes confused with other problems. Persistently soggy soil, yellowing foliage, stunted growth, and soft or rotting roots all indicate too much water rather than too little. Root rot in waterlogged carrots ruins the harvest entirely and can develop surprisingly quickly in containers that don't drain adequately. The fix is ensuring drainage holes are clear and functional, reducing watering frequency, and in severe cases repotting into fresh, well-draining soil.
Sunlight, Temperature, and Seasonal Growing
Carrots are cool-season crops and the implications of that classification for container growing are more positive and more practical than most beginners realize. Understanding the relationship between temperature, light, and carrot quality helps you make better decisions about when and where to grow your container carrots for maximum productivity.
Light requirements for container carrots are on the moderate end compared to fruiting vegetables — they need full sun for optimal growth, defined as six or more hours of direct sunlight daily, but they'll produce acceptable results with as few as four to five hours if the available light is bright and direct. The foliage of carrots is doing the photosynthetic work that builds the root, so adequate light produces more productive, faster-developing plants. Insufficient light produces slow growth, spindly foliage, and delayed root development. A south-facing patio, balcony, or windowsill is ideal. East or west-facing positions with several hours of direct morning or afternoon sun are workable. North-facing positions are genuinely challenging for carrots — if you're working with northern exposure, stick to the fastest-maturing, shortest varieties and accept slower development than you'd get in better light.
Temperature is where the container mobility advantage really pays off for carrot growing. Carrots germinate best and grow most vigorously at soil temperatures between 55°F and 75°F. Above 80°F, growth slows and germination rates drop. Above 85°F, germination rate drops significantly. For spring planting, this means starting containers as soon as nighttime temperatures are consistently above 45°F and daytime temperatures are in the comfortable growing range. For summer growing in hot climates, the ability to move containers to a cooler, shadier location during peak afternoon heat keeps soil temperatures in the productive range when stationary in-ground beds would be too hot to germinate seeds reliably.
Frost tolerance is one of the genuinely exciting characteristics of carrots for container growers, because it means the growing season extends significantly beyond what tender warm-season crops allow. Carrot foliage tolerates light frost — down to about 28°F — and the roots themselves are not damaged by frost as long as the soil doesn't freeze solid. In fact, a touch of frost actually improves carrot flavor by converting starches in the root to sugars — this is why late-season and fall-harvested carrots are consistently sweeter than summer-harvested ones. The ability to move containers under a covered porch, into a garage, or against a sheltered wall when frost threatens means container carrot growing can continue significantly later into autumn than in-ground growing in many climates.
Winter carrot growing is achievable in mild climates — USDA zones 7 and above — where hard freezes are infrequent. Container carrots can be grown throughout winter in these zones, producing their sweetest roots in the cool temperatures of the season. The mobility of containers means that even in zones 6 and colder, container carrots can extend into late autumn and resume in early spring weeks ahead of when in-ground growing becomes practical. For apartment balcony growers, this extended season is particularly valuable — every additional week of carrot production from a container that takes up minimal space is pure gain.
Fertilizing, Thinning, and Ongoing Care
Container carrot care between germination and harvest involves a small number of specific tasks that have outsized impact on final root quality. Getting these right — particularly thinning, which most beginners skip or underdo — determines whether your harvest is a collection of well-formed, flavorful roots or a disappointing tangle of overcrowded, underdeveloped ones.
Fertilizing container carrots requires restraint and timing awareness that differs from fertilizing leafy or fruiting container crops. The cardinal rule is avoiding high-nitrogen fertilizers during the active root development phase, which is essentially the entire growing period after seedling establishment. Nitrogen promotes leafy top growth — exactly what you see when carrots have been overfed with nitrogen, lush beautiful tops and disappointing root development beneath. A low-nitrogen, higher-phosphorus and potassium fertilizer encourages root development over foliage growth. I use a diluted balanced liquid fertilizer at half strength once every three to four weeks during the growing season — modest feeding that supports consistent growth without pushing excessive nitrogen into the root zone. An alternative approach that many carrot growers prefer is simply building adequate fertility into the initial soil mix through well-aged compost and relying on that base fertility for the entire season without supplemental feeding.
Thinning is the single most important ongoing care task for container carrots and the step that most beginners either skip entirely or do inadequately. When carrot seeds are scattered at the recommended density for germination insurance, the resulting seedling stand is far too dense for good root development — the plants will compete for space, water, and nutrients, producing a tangle of underdeveloped, forked roots rather than well-formed individual carrots. Thinning means removing enough seedlings to leave the remaining plants properly spaced.
The final spacing for most short and medium carrot varieties is two to three inches between plants. For round varieties like Paris Market, two inches is adequate. For Chantenay and Nantes types, three inches gives each root room to develop to full diameter. Thin in two stages rather than all at once: first thin to about an inch apart when seedlings are one to two inches tall, then thin to final spacing when seedlings are three to four inches tall. Two-stage thinning is gentler on remaining plants — single-stage thinning from dense seeding to final spacing disturbs the soil and roots of neighboring seedlings more than gradual thinning. Use scissors to cut thinned seedlings at the soil line rather than pulling them — pulling disturbs the roots of adjacent seedlings, which you're trying to preserve.
Green shoulders — the green or light-colored top portion of the carrot root that protrudes above the soil surface — is a cosmetic and flavor issue caused by the top of the root being exposed to light. Exposed carrot root tissue turns green through chlorophyll production (the same process that greens potato skins when exposed to light) and the green portion develops a slightly bitter flavor. Preventing green shoulders is simple: as carrots grow and their roots begin to show above the soil surface, mound additional soil around the base of the plants to keep roots covered. This is easier in containers than in-ground beds because you can add soil to the top of the container progressively as needed.
Harvesting Container Carrots and What to Do Next
Harvest is the payoff for the weeks of patient tending — and with container carrots, the harvesting process itself is one of the genuine pleasures of growing in a container rather than in-ground. Getting it right means maximum root quality and minimal damage to what you've grown.
Knowing when carrots are ready requires a combination of reading the days-to-maturity on the seed packet and doing a physical check of the root development. Days to maturity for short and compact varieties typically runs from fifty-five to seventy-five days from germination — longer-maturing types can run eighty to ninety days. Use the seed packet days as a rough guide, but the definitive check is to gently brush soil away from the top of one or two roots and look at the shoulder diameter. For round varieties, a marble-to-golf-ball diameter indicates readiness. For Chantenay types, a shoulder diameter of three-quarters to one inch or more at the top of the root indicates full development. Flavor also improves with maturity — a small taste test is genuinely the best way to know if your specific plants in your specific conditions are ready, because growing conditions affect development speed significantly.
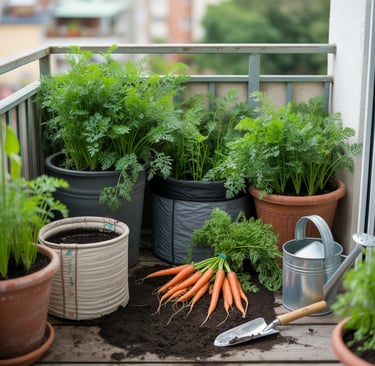
The harvesting technique for container carrots is where the fabric pot advantage becomes immediately obvious. For fabric pots, tip the container over onto a tarp or drop cloth, squeeze the sides of the bag to loosen the soil, and gently work the root ball out. Roots are visible and accessible in the loose soil without any digging — just separate them with your hands. For rigid containers, water thoroughly the day before harvesting to soften the soil, making root extraction easier. Use a trowel to loosen the soil around the perimeter of the container before attempting to pull roots, and support the root with your other hand as you extract it to prevent snapping the root tip.
Storing harvested container carrots starts with removing the tops immediately after harvest — carrot foliage draws moisture from the root, and leaving tops attached accelerates wilting. Cut the tops to about half an inch above the root crown and store roots in the refrigerator in a sealed container or plastic bag with a slightly damp paper towel. Under these conditions, short carrot varieties stay fresh and crisp for two to three weeks. For longer storage, carrots can be packed in slightly damp sand or sawdust in a cool location — a traditional root cellar technique that keeps carrots in excellent condition for months.
After harvest, the container is ready for the next crop with some preparation. Empty any remaining soil, checking for broken root pieces and any signs of disease. Refresh the soil mix — either replace it entirely with fresh mix or amend and revitalize the existing mix with compost and additional sand or perlite. Container soil that's been used for a season of carrots will have depleted some nutrients and may have lost some of its initial structure through repeated watering. Refreshing it before replanting ensures the next succession starts with the same optimal growing conditions as the first.
Succession planting is what transforms container carrot growing from a single seasonal event into a near-continuous kitchen supply. Because short carrot varieties mature in fifty-five to seventy-five days, it's possible to grow two to three successions per container per year in most climates — a spring crop, a summer crop in cool-climate areas or a fall/early winter crop in warm areas, and a fall crop that matures into early winter. Starting a new container of seeds every six to eight weeks during the appropriate growing season means you always have one container approaching harvest while another is in active growth and another is just germinating. The satisfaction of pulling fresh homegrown carrots from a container on your balcony or patio multiple times a year from a setup that takes up minimal space is something that a lot of gardeners discover and never want to give up.
Conclusion
Container gardening is genuinely the best way to grow carrots for most home gardeners, and I say that not as a consolation prize for people without in-ground space but as a considered opinion based on years of growing carrots both ways. The control over soil quality, the elimination of compaction and rocky soil problems, the pest management advantages, and the flexibility of container mobility create conditions where carrots thrive in ways that in-ground growing in average soil rarely matches.
Start with a fabric pot — ten gallons or larger — filled with a light, sandy soil mix, a packet of Chantenay or Paris Market seeds, and the commitment to keep the seeds moist through germination and to thin properly once they're up. Those three decisions — right container, right soil, right variety — solve the problems that make most carrot growing attempts fail. Everything else is straightforward ongoing care.
Share your container carrot setup, your favorite variety discoveries, your harvest photos, or your questions in the comments below. Whether you're growing round Paris Market carrots in a window box, a rainbow mix of colorful varieties in a fabric pot on your balcony, or your first cautious experiment with a single small container — this is the right place to talk about what's working and what isn't. Now go find a deep pot and some carrot seeds. 🥕